

Provider: State management made easy in Flutter
This article gives a general overview of state, state management and one of the Flutter state management libraries (Provider).

I am a developer from Nigeria. Currently learning and working on Mobile Application development with Flutter and Python development. I am interested in learning, creating new things and writing about most of them.
While building large-scale mobile applications, the need to share data between widgets or screens would arise. For instance, when you are saving a list of bookmark items. The bookmark is saved in a screen and is viewed in a different screen. To do this, developers can make use of callbacks which are passed from one widget to the other. However, this solution will become too cumbersome, especially when dealing with a deeply nested application with the need to pass data across multiple screens. A more suitable solution is the use of state management libraries.
This article describes managing the state of a simple application with a state management library.
What is State?
State simply refers to the widget data stored in memory at any point in time. The two types of state that exist in Flutter are:
app state: a state that is shared across the applicationephemeral state: a state that is specific only to a widget
What is State Management?
State management is simply the process of tracking how state details are shared in your application. Flutter gives the StatefulWidget as one of the means of state management. But the StatefulWidget is limited in that it becomes cumbersome to manage the app state using the StatefulWidget. There are several libraries for managing state, one of which is the Provider library.
Provider
Provider gives you easy access to InheritedWidget. InheritedWidget is a base class widget that efficiently propagates information down the tree. Therefore, Provider is a wrapper around InheritedWidget that enables ease of usage to users. The following are some key terms to know while using Provider:
ChangeNotifierProvider
This is a provider for ChangeNotifier class. ChangeNotifierProvider provides a ChangeNotifier to the child.
ValueNotifierProvider
This is a provider for ValueNotifier class. ValueNotifierProvider provides a ValueNotifier to the child.
Provider
This is a normal provider class that passes the information it provides to the descendants.
ChangeNotifier
This is a class which enables other listener classes to get notified whenever there is a change and then rebuild accordingly.
There are others used in accessing a provided item, such as:
context.read<T>(): this doesn’t listen to changes and only returns T.
context.watch<T>(): this listen to changes made on T.
context.select<T, R>(R cb(T value)): this allows a widget to listen to only part of T and not the entire thing.
Provider.of<T>(context): this behaves like watch except the listen property is set to false, then it doesn’t listen to changes made.
All these methods look up to the parent BuildContext, to find the provided nearest variable of type T up the widget tree and then access it. In a case where the widget doesn’t have a parent BuildContext, Consumer should be used.
Consumer
This class listens for changes in the provided item and rebuilds its descendant widget accordingly. It is advisable to use consumer in the lowest class level that you want to rebuild to avoid unnecessary rebuilding of the entire widget tree.
Utilizing Provider in a simple application
Now that you have understood the concept of provider and some of the classes in the provider library. You will utilise the provider library to create a simple application that displays a list of fruits. The application will contain two screens. The fruit screen, where a user can mark any fruit as a favourite and the favourites screen, which contains the list of favourite fruits.
To get started, you will:
Create an application, preferably named “StateManagement Demo”.
Clear the existing boiler code
Add the provider library to the dependency
Add the provider library to your application in pubspec.yaml, under dependencies. This gives access to the Provider class and all other classes in the library.
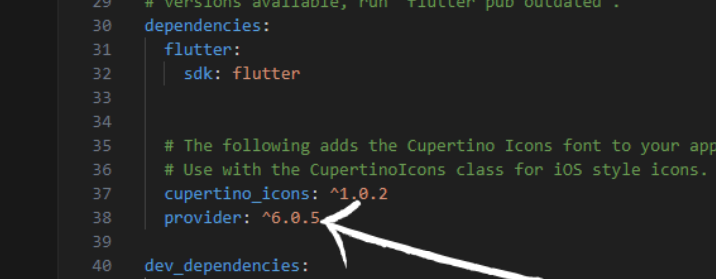
Save it or run flutter pub get in the terminal.
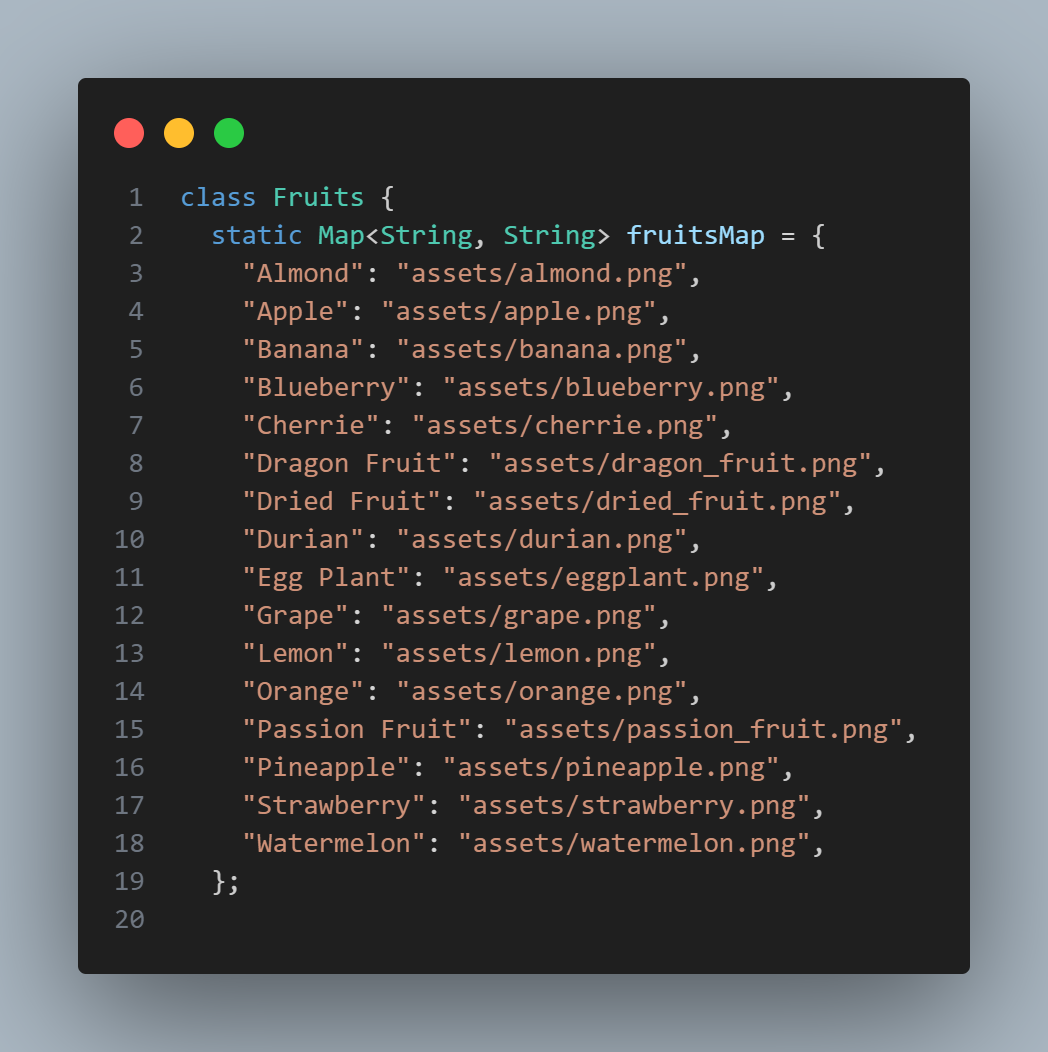
Creating the model folder and its subdirectories
Create a new folder titled model. In the folder, create the fruits_model.dart. This file will hold the hardcoded list of fruits that will be displayed. You can get access to the assets file at asset_file.
In the fruits_model.dart:
- Create the class
Fruit, which contains twoStringproperties.
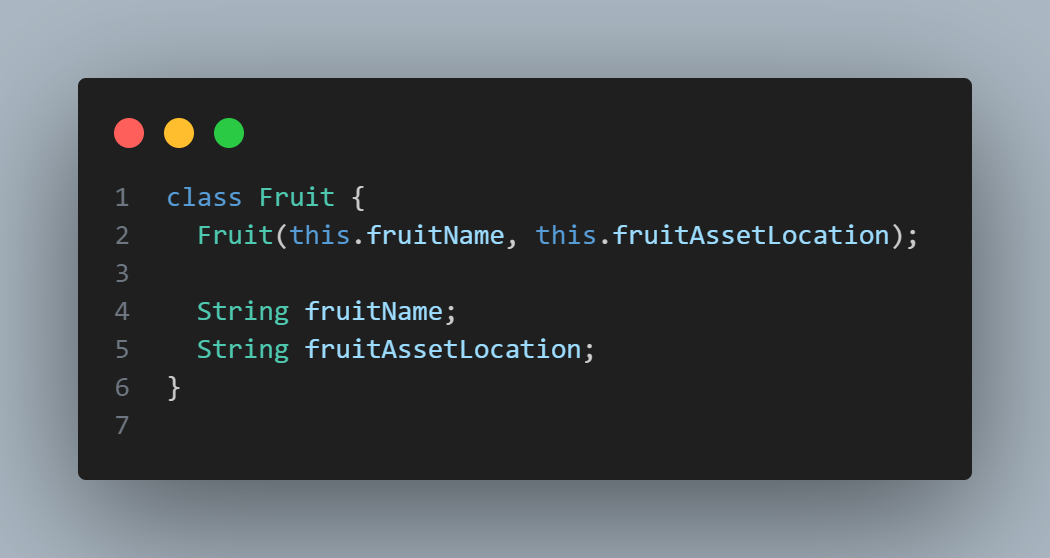
- Create another class,
Fruitsthat contains a map of “fruit names” to the fruits image location.
- Create a variable that converts the fruits map to the list of fruits.

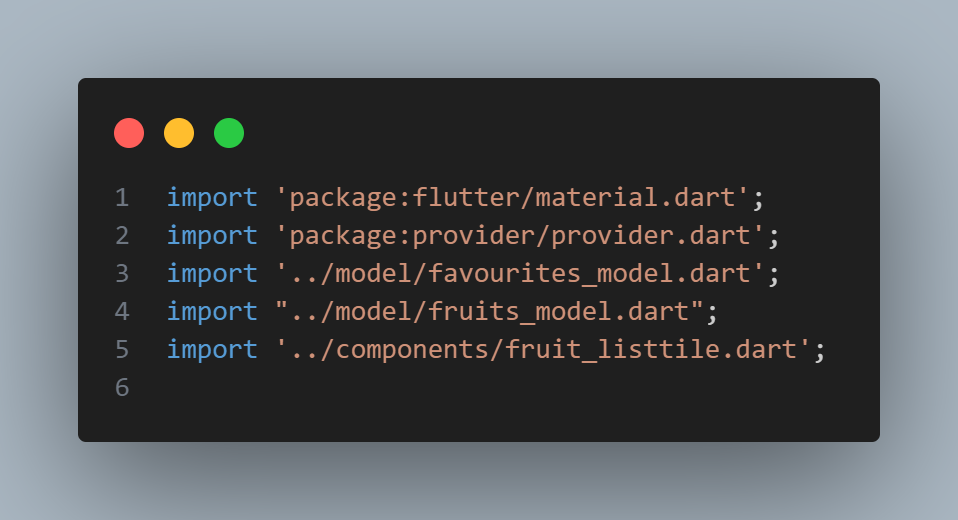
Create another file called favourites_model.dart.
In the file, you add the following:
Import the
fruits_model.dart,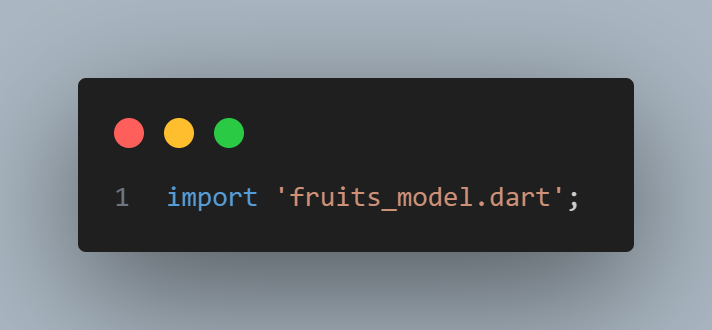
Import
package:flutter/foundation.dart(this enables you to access the ChangeNotifier class)Create a class called
FavouritesModelthat extendsChangeNotifier.Create an empty list named
_favouriteFruits(to store each fruit that has been marked favourite).

- Create a getter method called
favouriteFruitswhich gets the private_favouriteFruitsand makes it accessible outside the class.

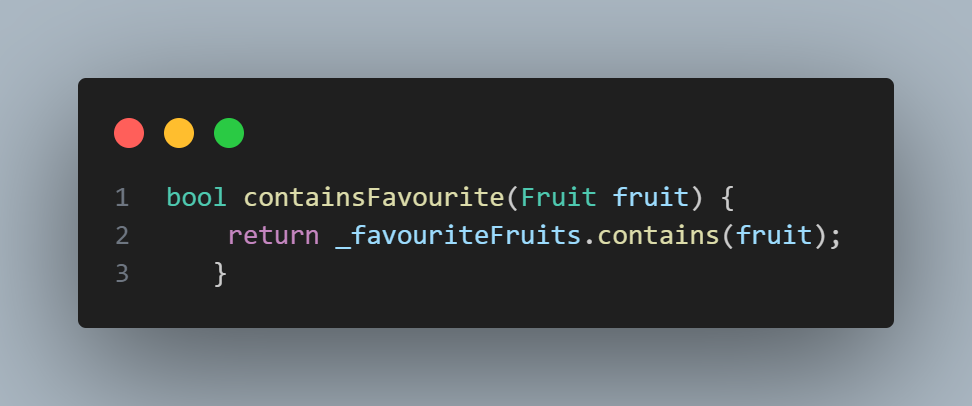
- Create a method called
containsFavouriteto determine if the created list contains the marked favourite fruit.
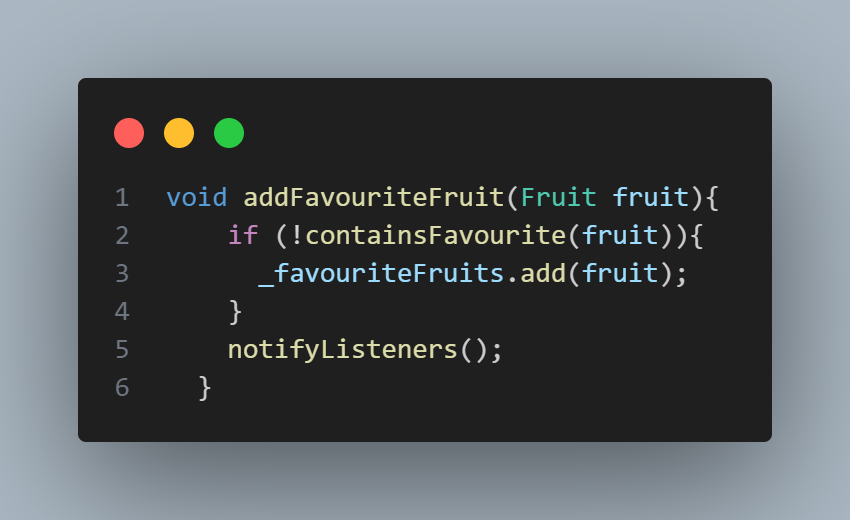
- Create a method called
addFavouriteFruit, which adds the favourite fruit and callsnotifyListeners(). notifyListeners is a method provided by ChangeNotifier.
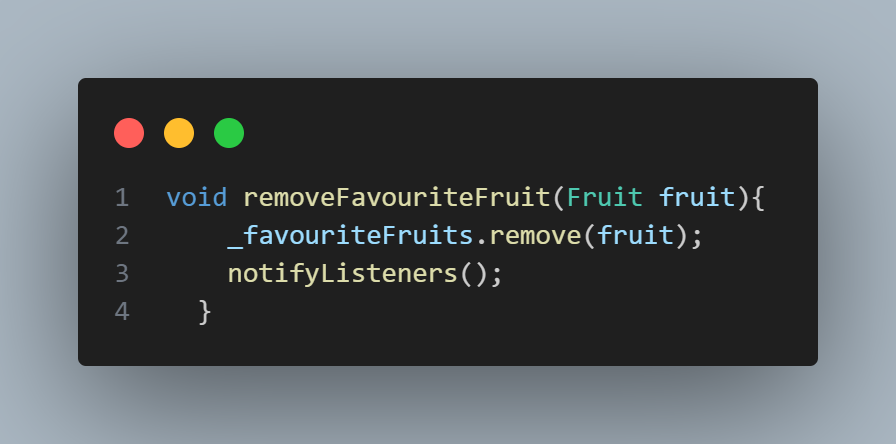
- Create another method called
removeFavouriteFruit, also calls notifyListeners, to remove fruit from the list of favouriteFruits.
Create the components folder
This folder is for creating components to style the UI. In the folder you will create the following:
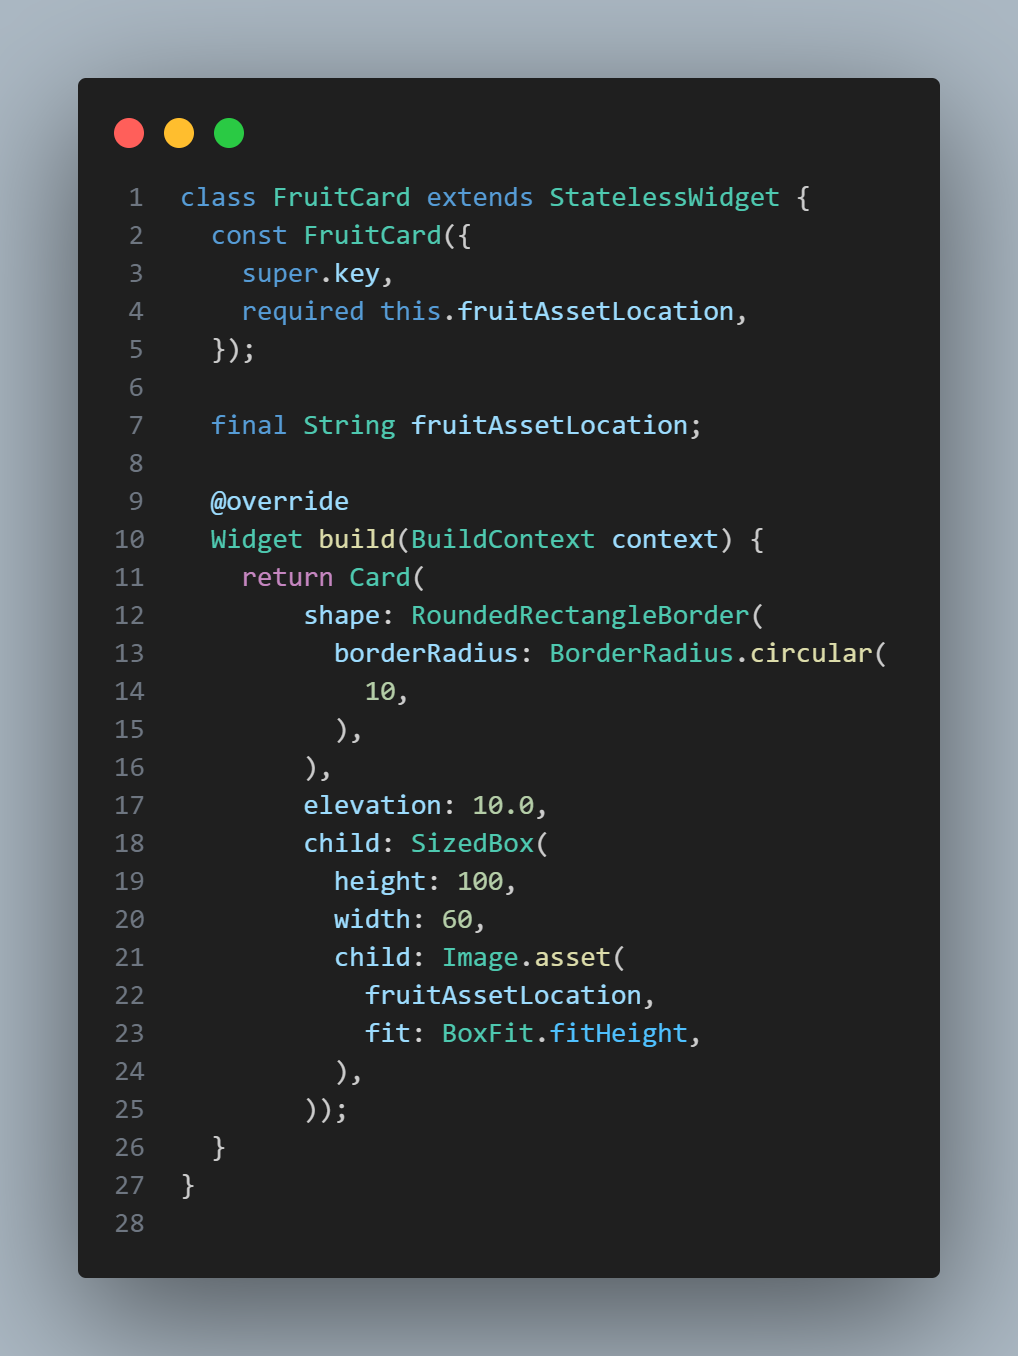
- Create the
fruit_card.dart. This will contain code to create a fruit image in a card, as shown below.
- Create the
fruit_listtile.dart. This file contains code to create each fruit in a list tile having leading as the fruit image, title as the fruit name and a nullable widget for the trailing parameter.

Create the screens folder
Create a new folder titled screens, where you will create the fruit screen and the favourite screen.
fruit_screen.dart
First, create the fruit_screen.dart file. In the file, do the following:
- Import the following files to be used.
Create a new StatelessWidget titled
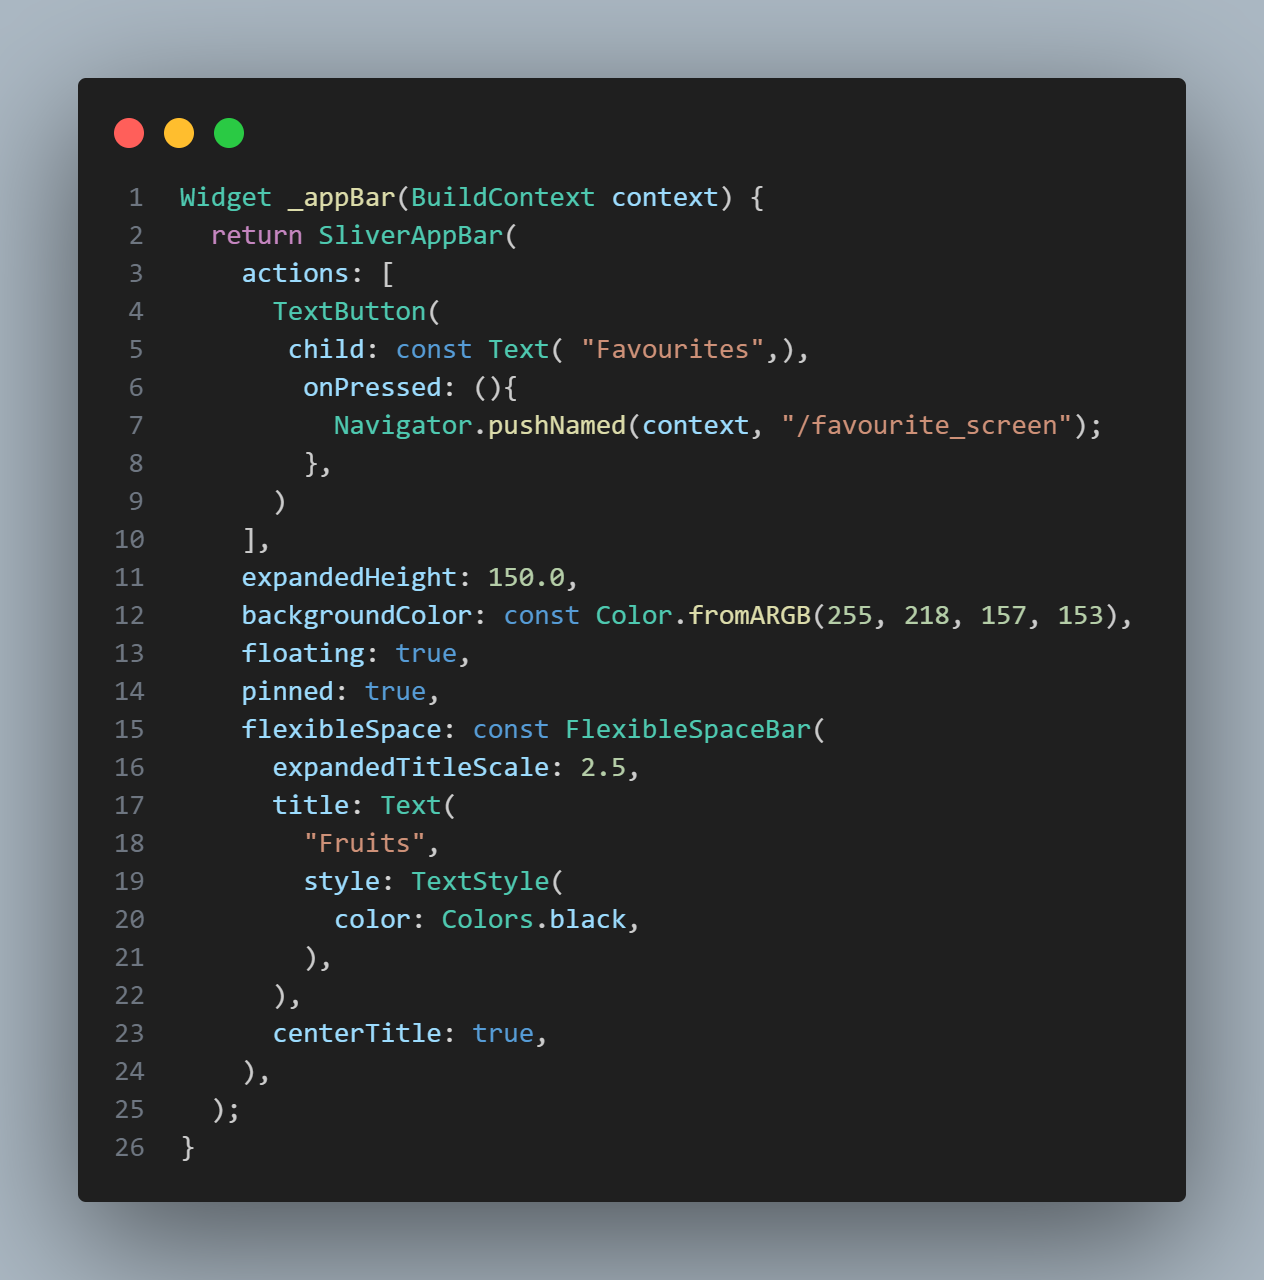
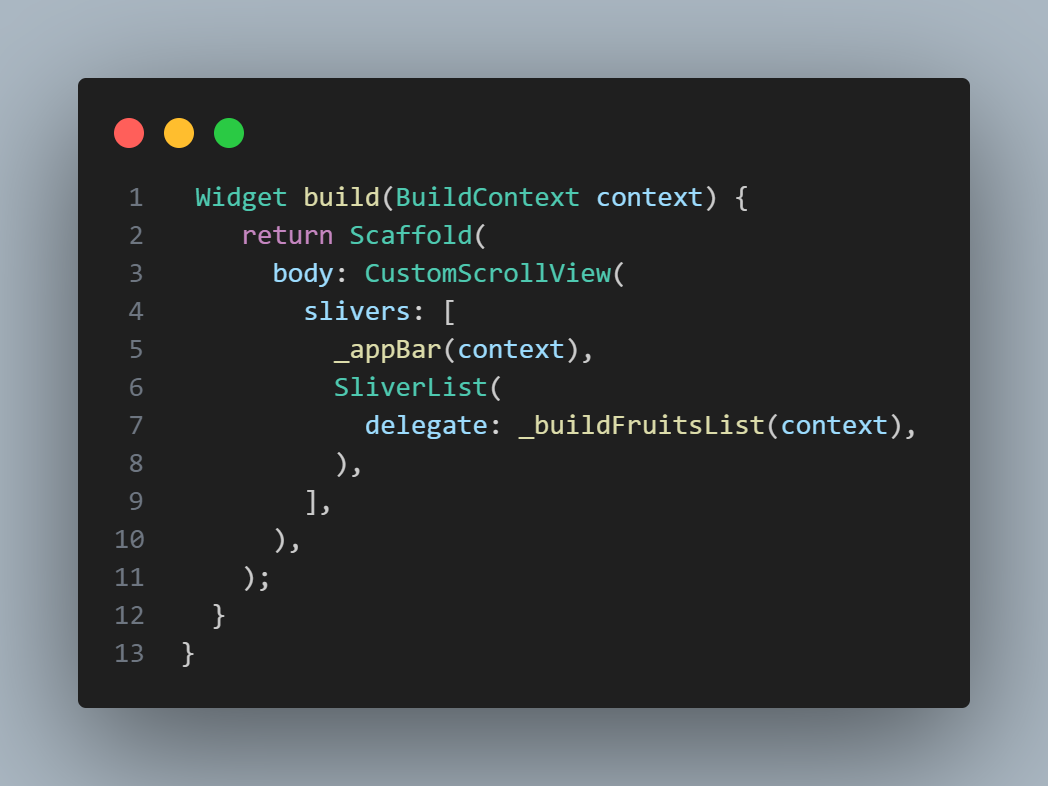
FruitScreen, which returns aScaffoldin its build method. In the Scaffold, create aCustomScrollView(this enables you to create scrollable contents). The CustomScrollView contains properties, such as slivers, to build the appropriate sliverappbar and sliverlist body.Create the
SliverAppBar, with the title “Fruits” and aTextButtontitled “Favourites”, to navigate to the Favourite Screen.
- Create the SliverChildDelegate, which is the body of your screen.
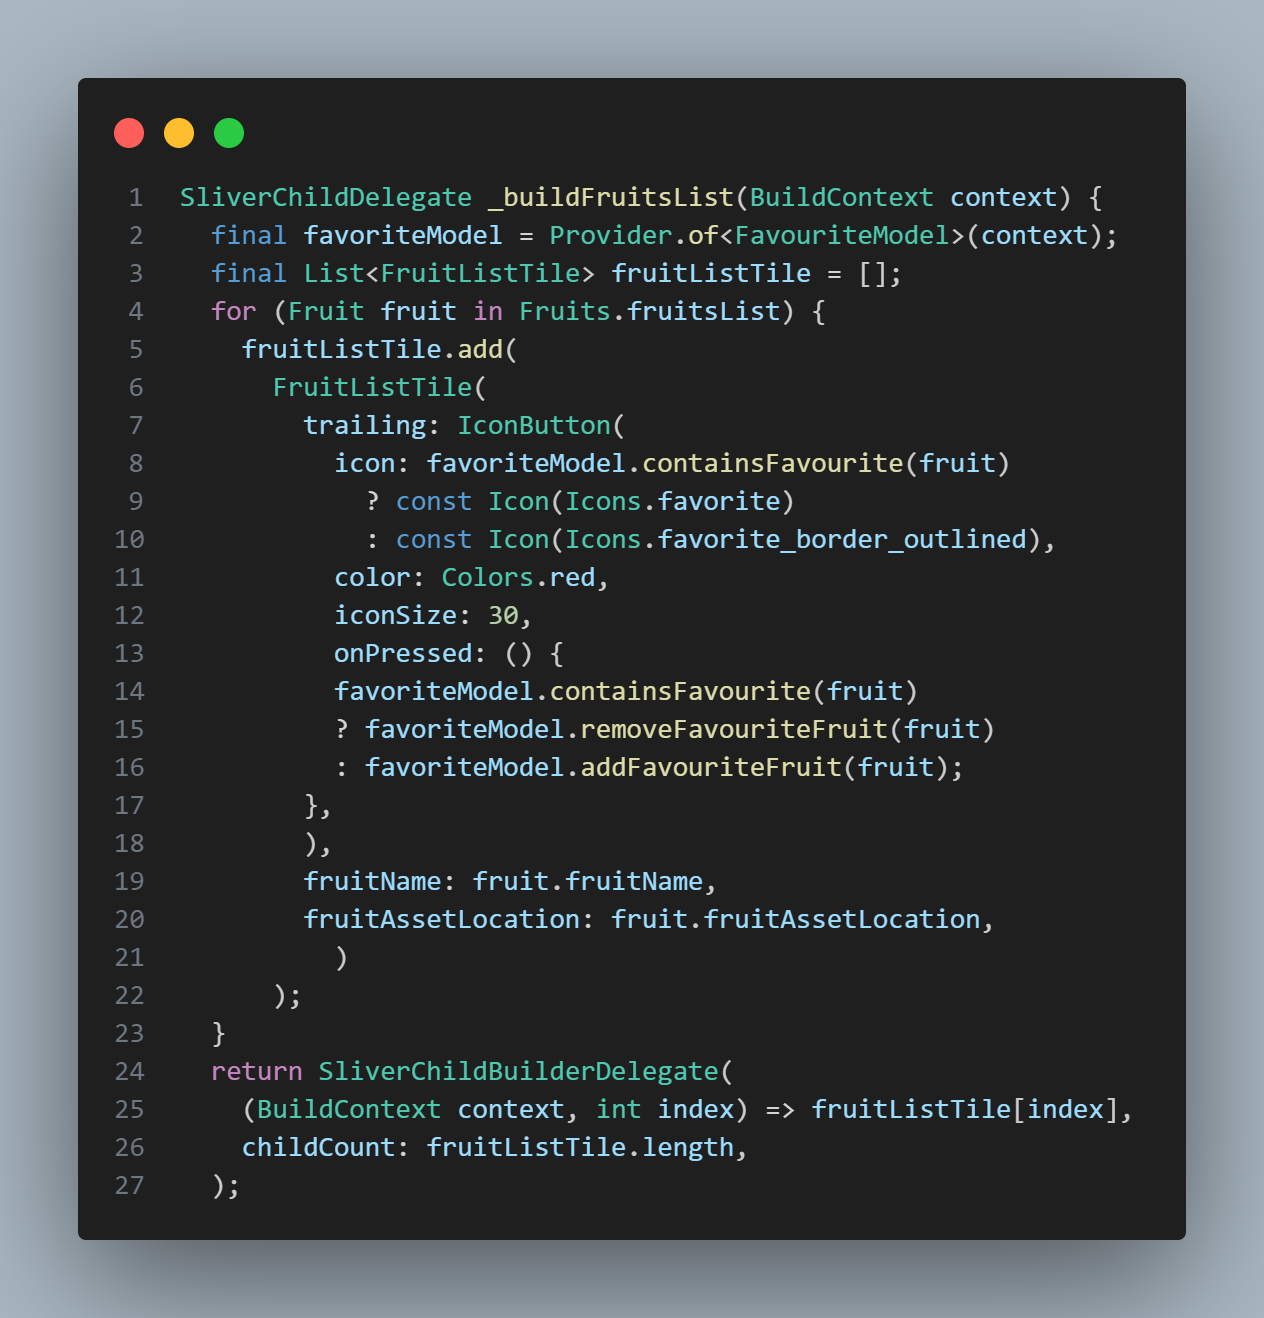
The code above contains an instance of Provider.of<FavouriteModel>(context). This gives you access to the provided FavouriteModel, which you use in modifying the list for your FruitScreen.
- Add the SliverAppBar and SliverChildDelegate to your CustomScrollView.
However, the application is not complete because the goal is to be able to view the favourite fruits on a separate screen. To do that, you will build your favourite screen.
favourite_screen.dart
First, create the favourite_screen.dart file. In the file, do the following:
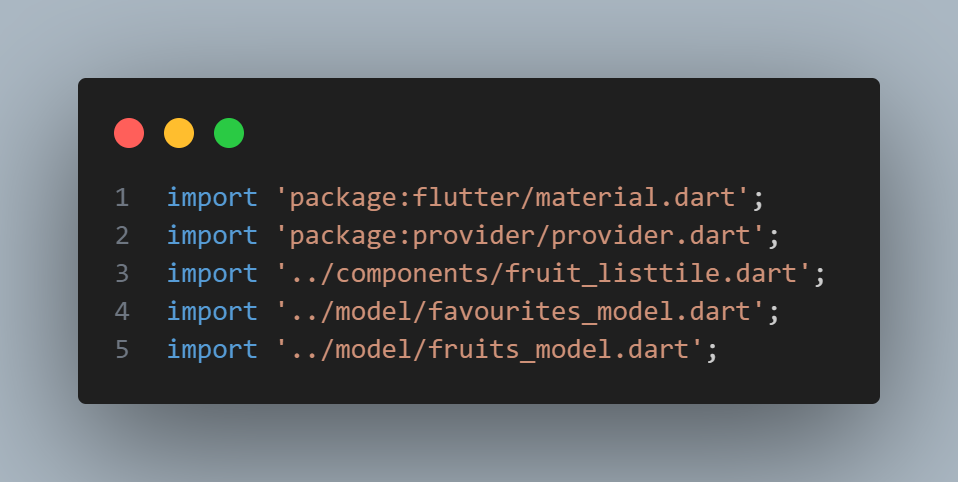
- Import the following files to favourite_screen.dart.
Create a new StatelessWidget titled
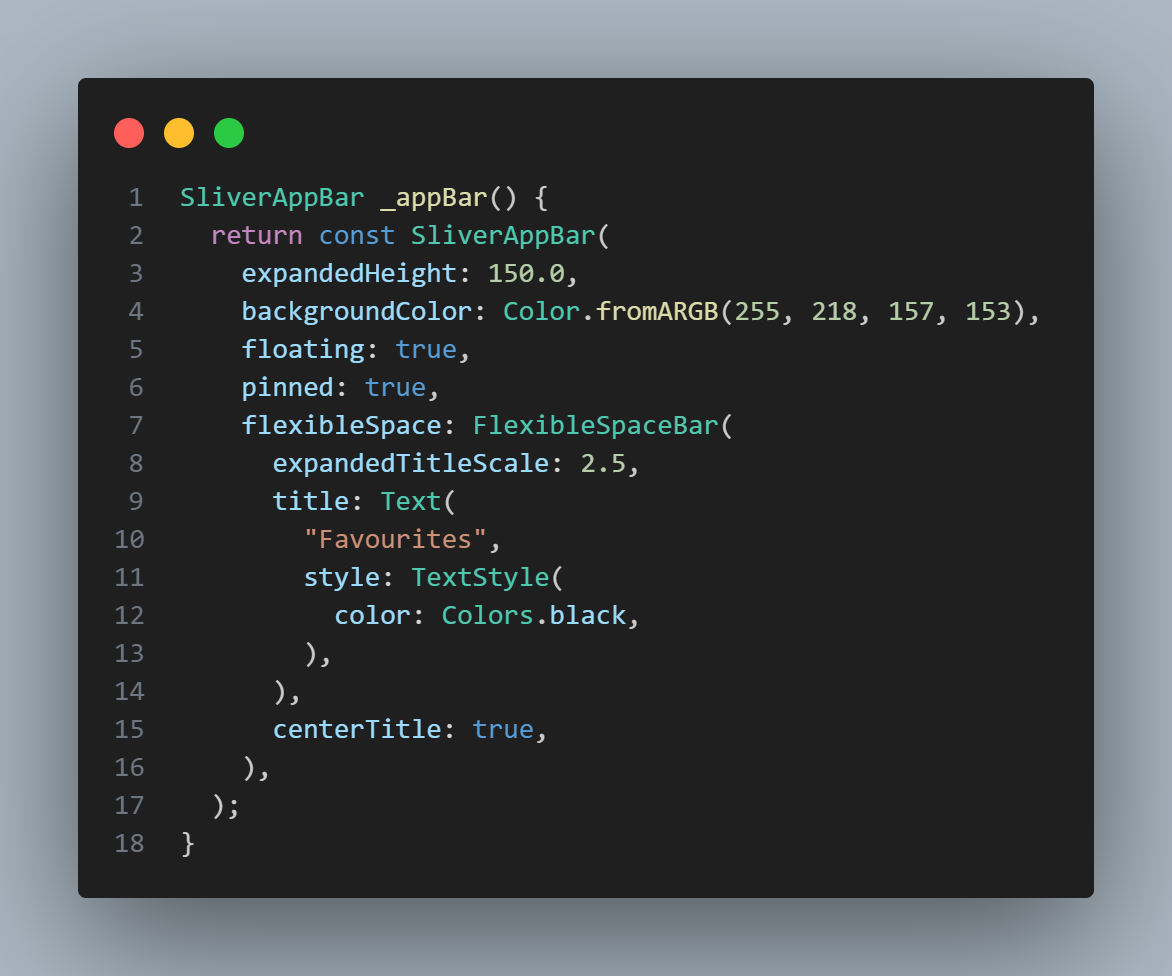
FavouriteScreen, which returns a Scaffold in its build method. In the Scaffold, create a CustomScrollView, to be able to scroll through the list of its contents. The CustomScrollView contains properties such as slivers to build the appropriate sliverappbar and sliverlist body. The sliverlist makes use of a delegate argument of type SliverChildDelegate.Create the SliverAppBar, with the title “Favourites”.
- Create the
SliverChildDelegate, which is the body of your screen.
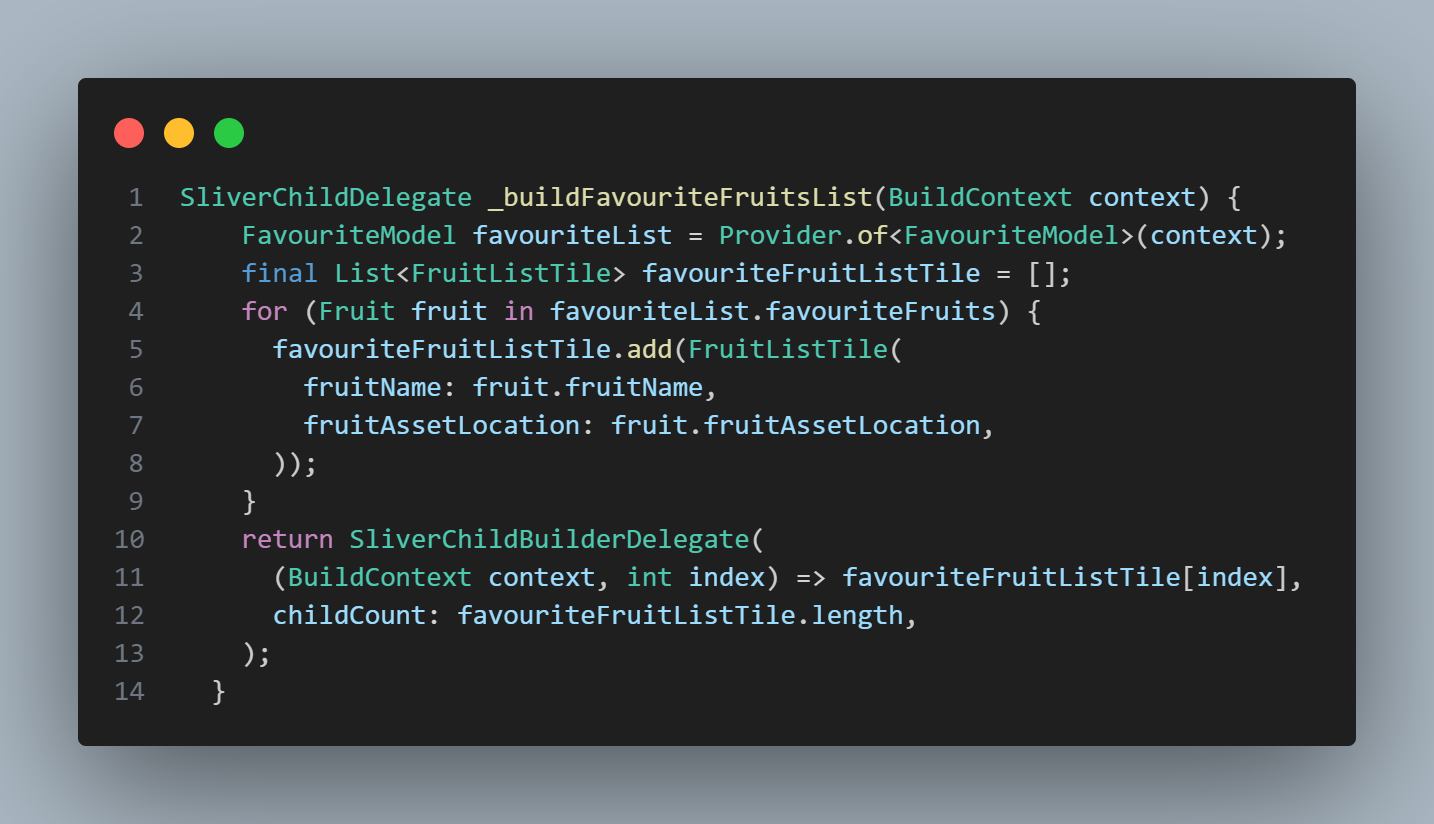
The above code contains an instance of Provider.of<FavouriteModel>(context). This gives you access to the provided FavouriteModel, which you use in building the list of fruits in the FavouriteScreen.
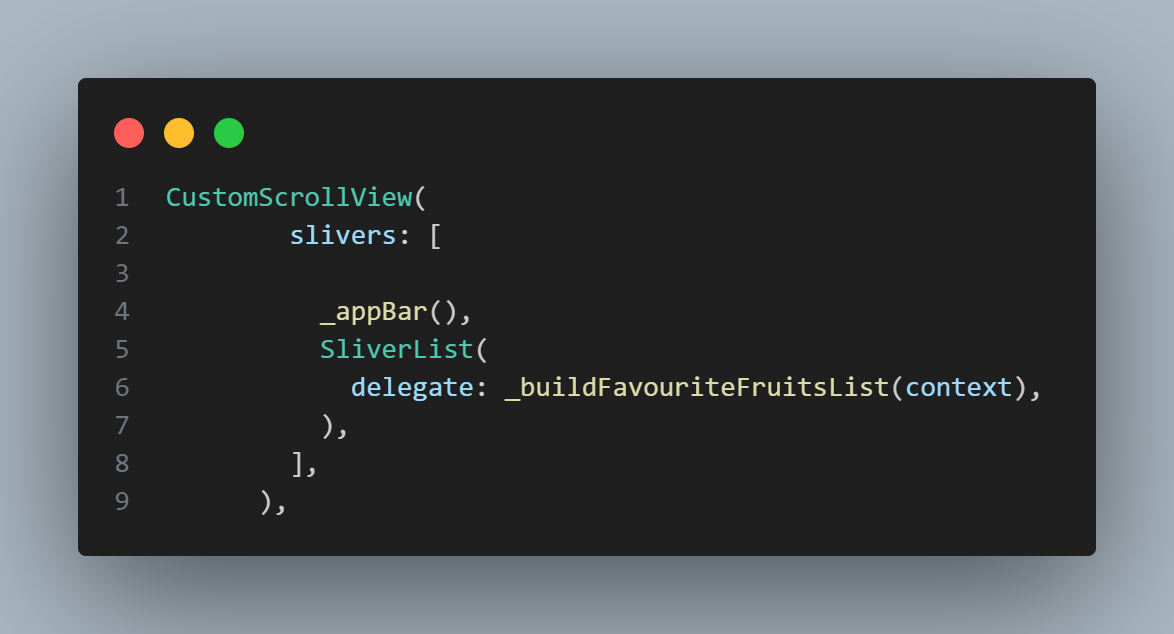
- Add the codes under silvers in your CustomScrollView.
Provide the created model
For Favourite Screen to display the favourite fruits, you will create a provider. Provider is to be created above all the widgets that need access to the file it provides. For this case, the favourite_model is needed in both FruitScreen and FavouriteScreen. As such, you need to add the provider to the class above both classes. You add it to the MaterialApp since that is the only widget above the other widgets. To do that, open the main.dart file. Perform the following in the file:
- Import the following libraries.

- Add the following code to main.dart.
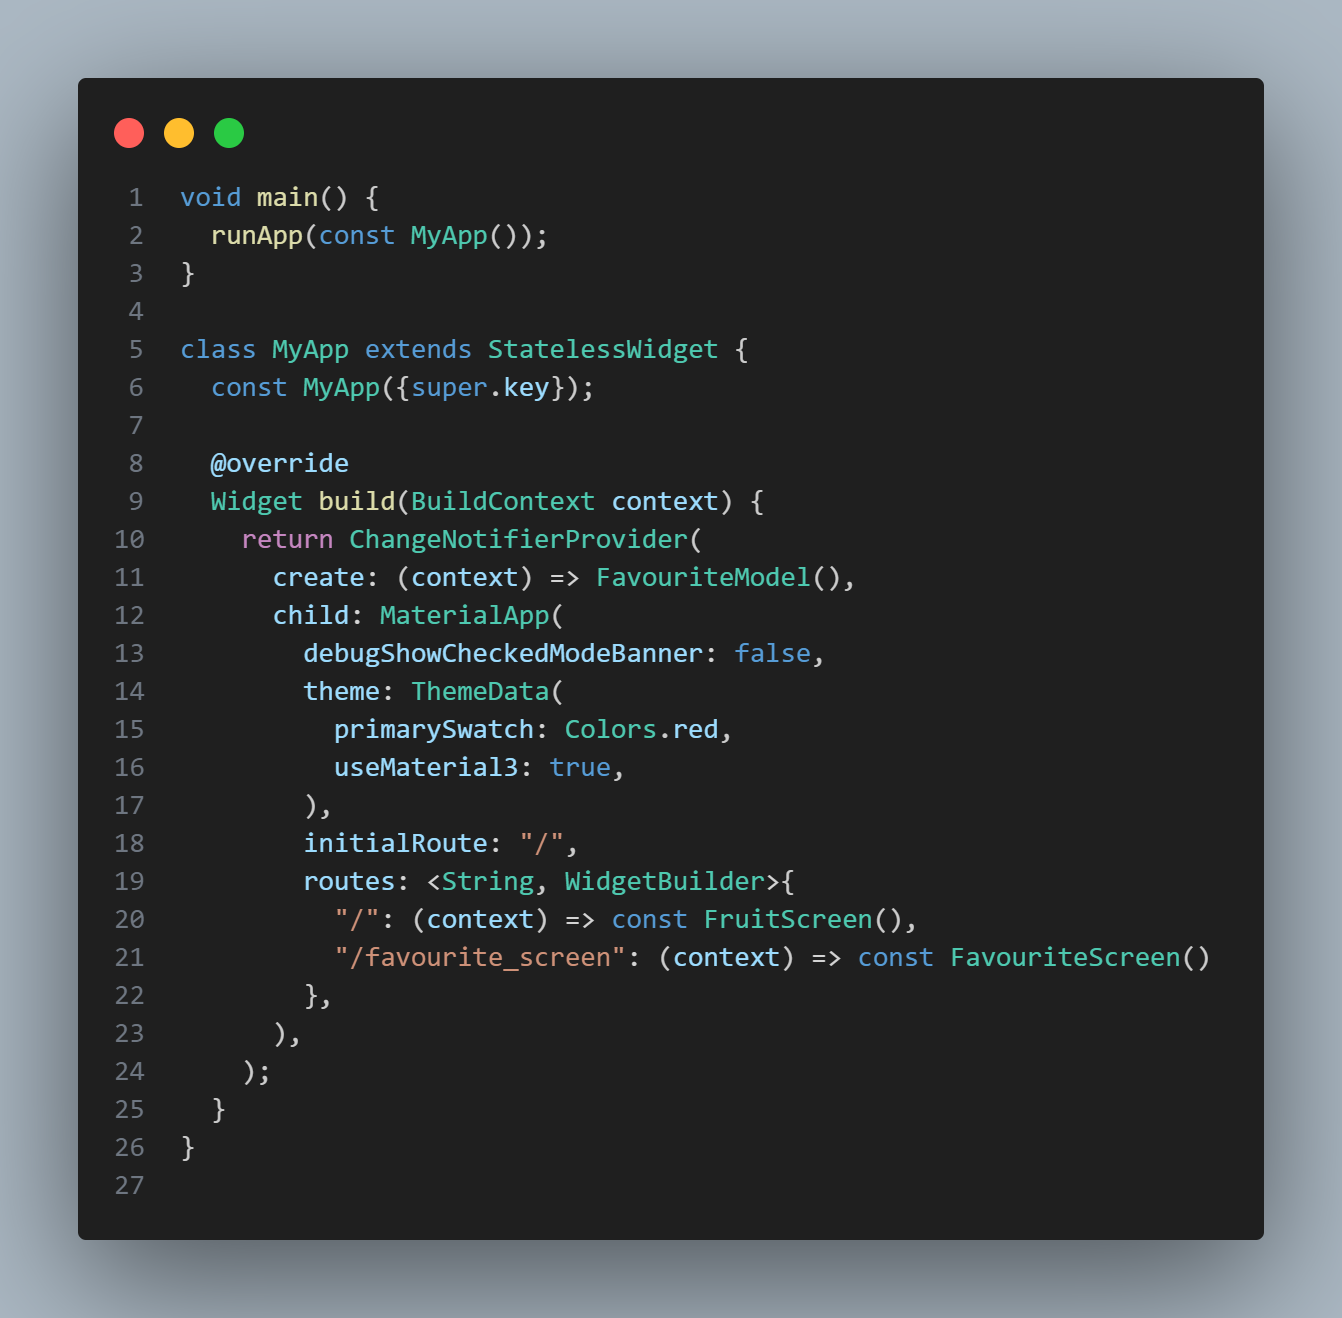
In the above code, the ChangeNotifierProvider contains the created model needed in other widgets. You pass the necessary class to be provided and the child argument, which is passed to the descendant widget that requires the provided item. In this case, you add FavouriteModel to the create argument and MaterialApp to the child argument. Also, routes are added to MaterialApp, for navigating between screens. The entire thing is added to runApp under the main method, which enables the application to run.
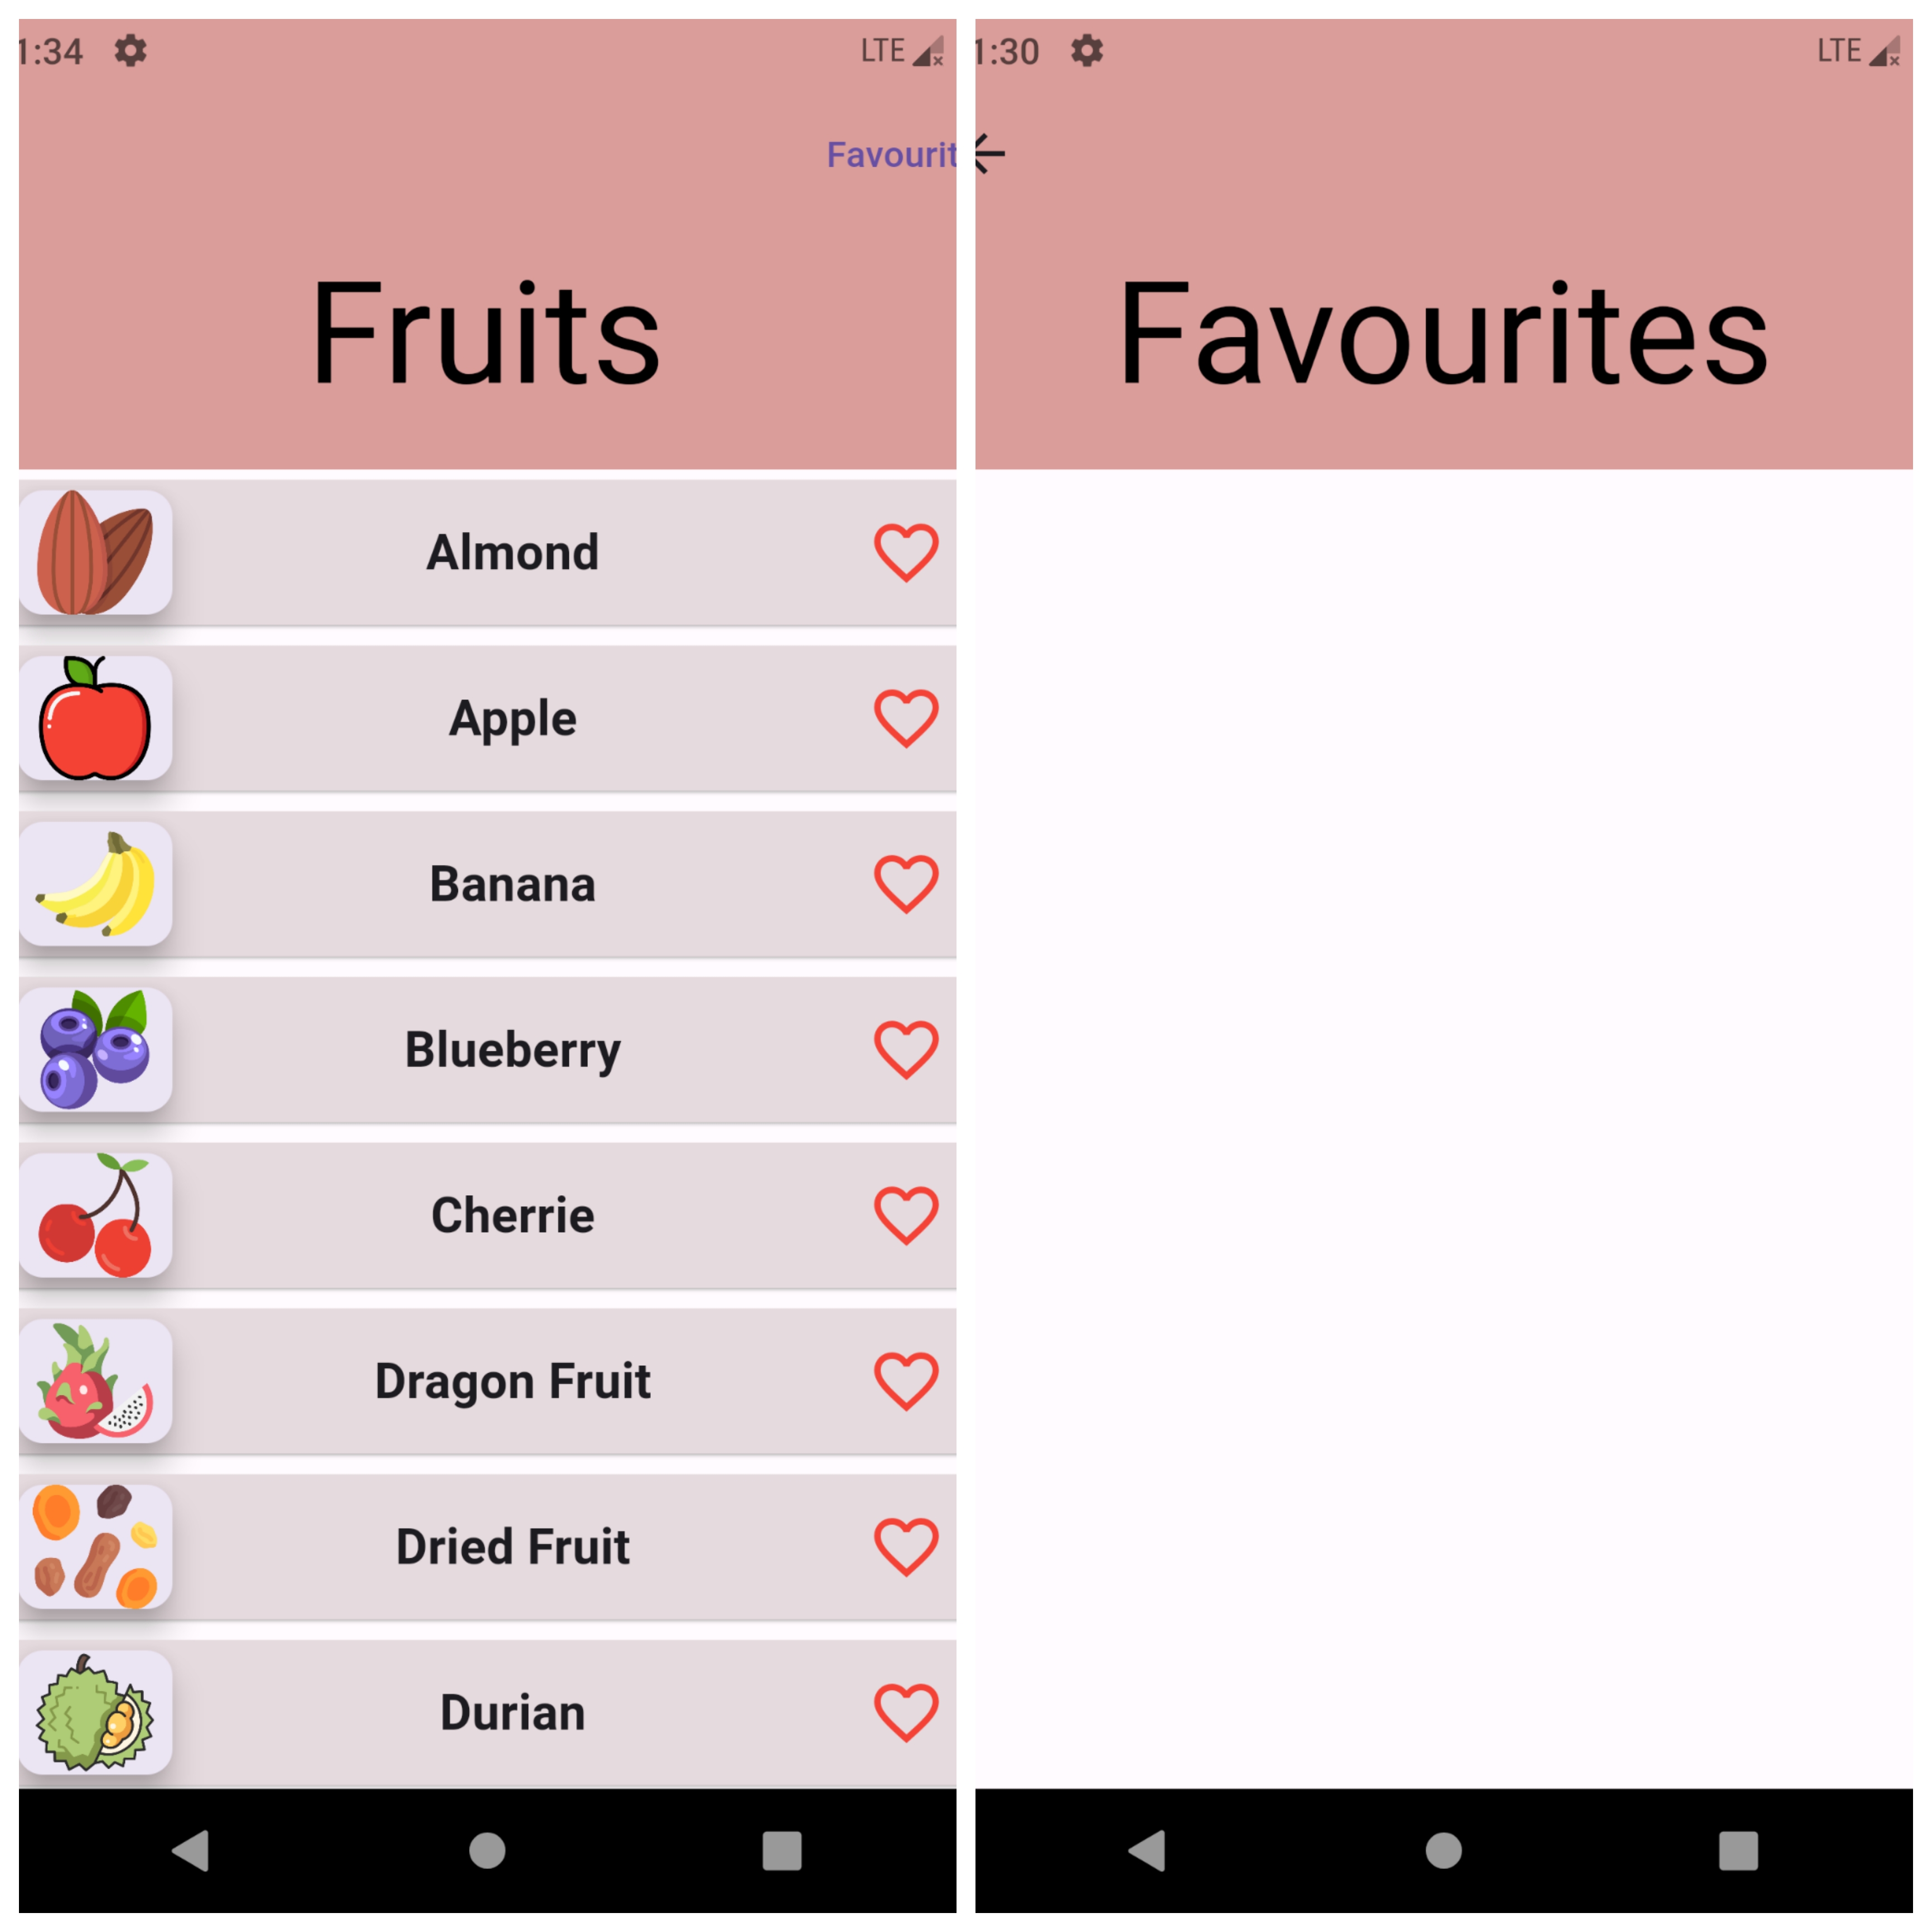
Outcome
When you run the app, you will see this:
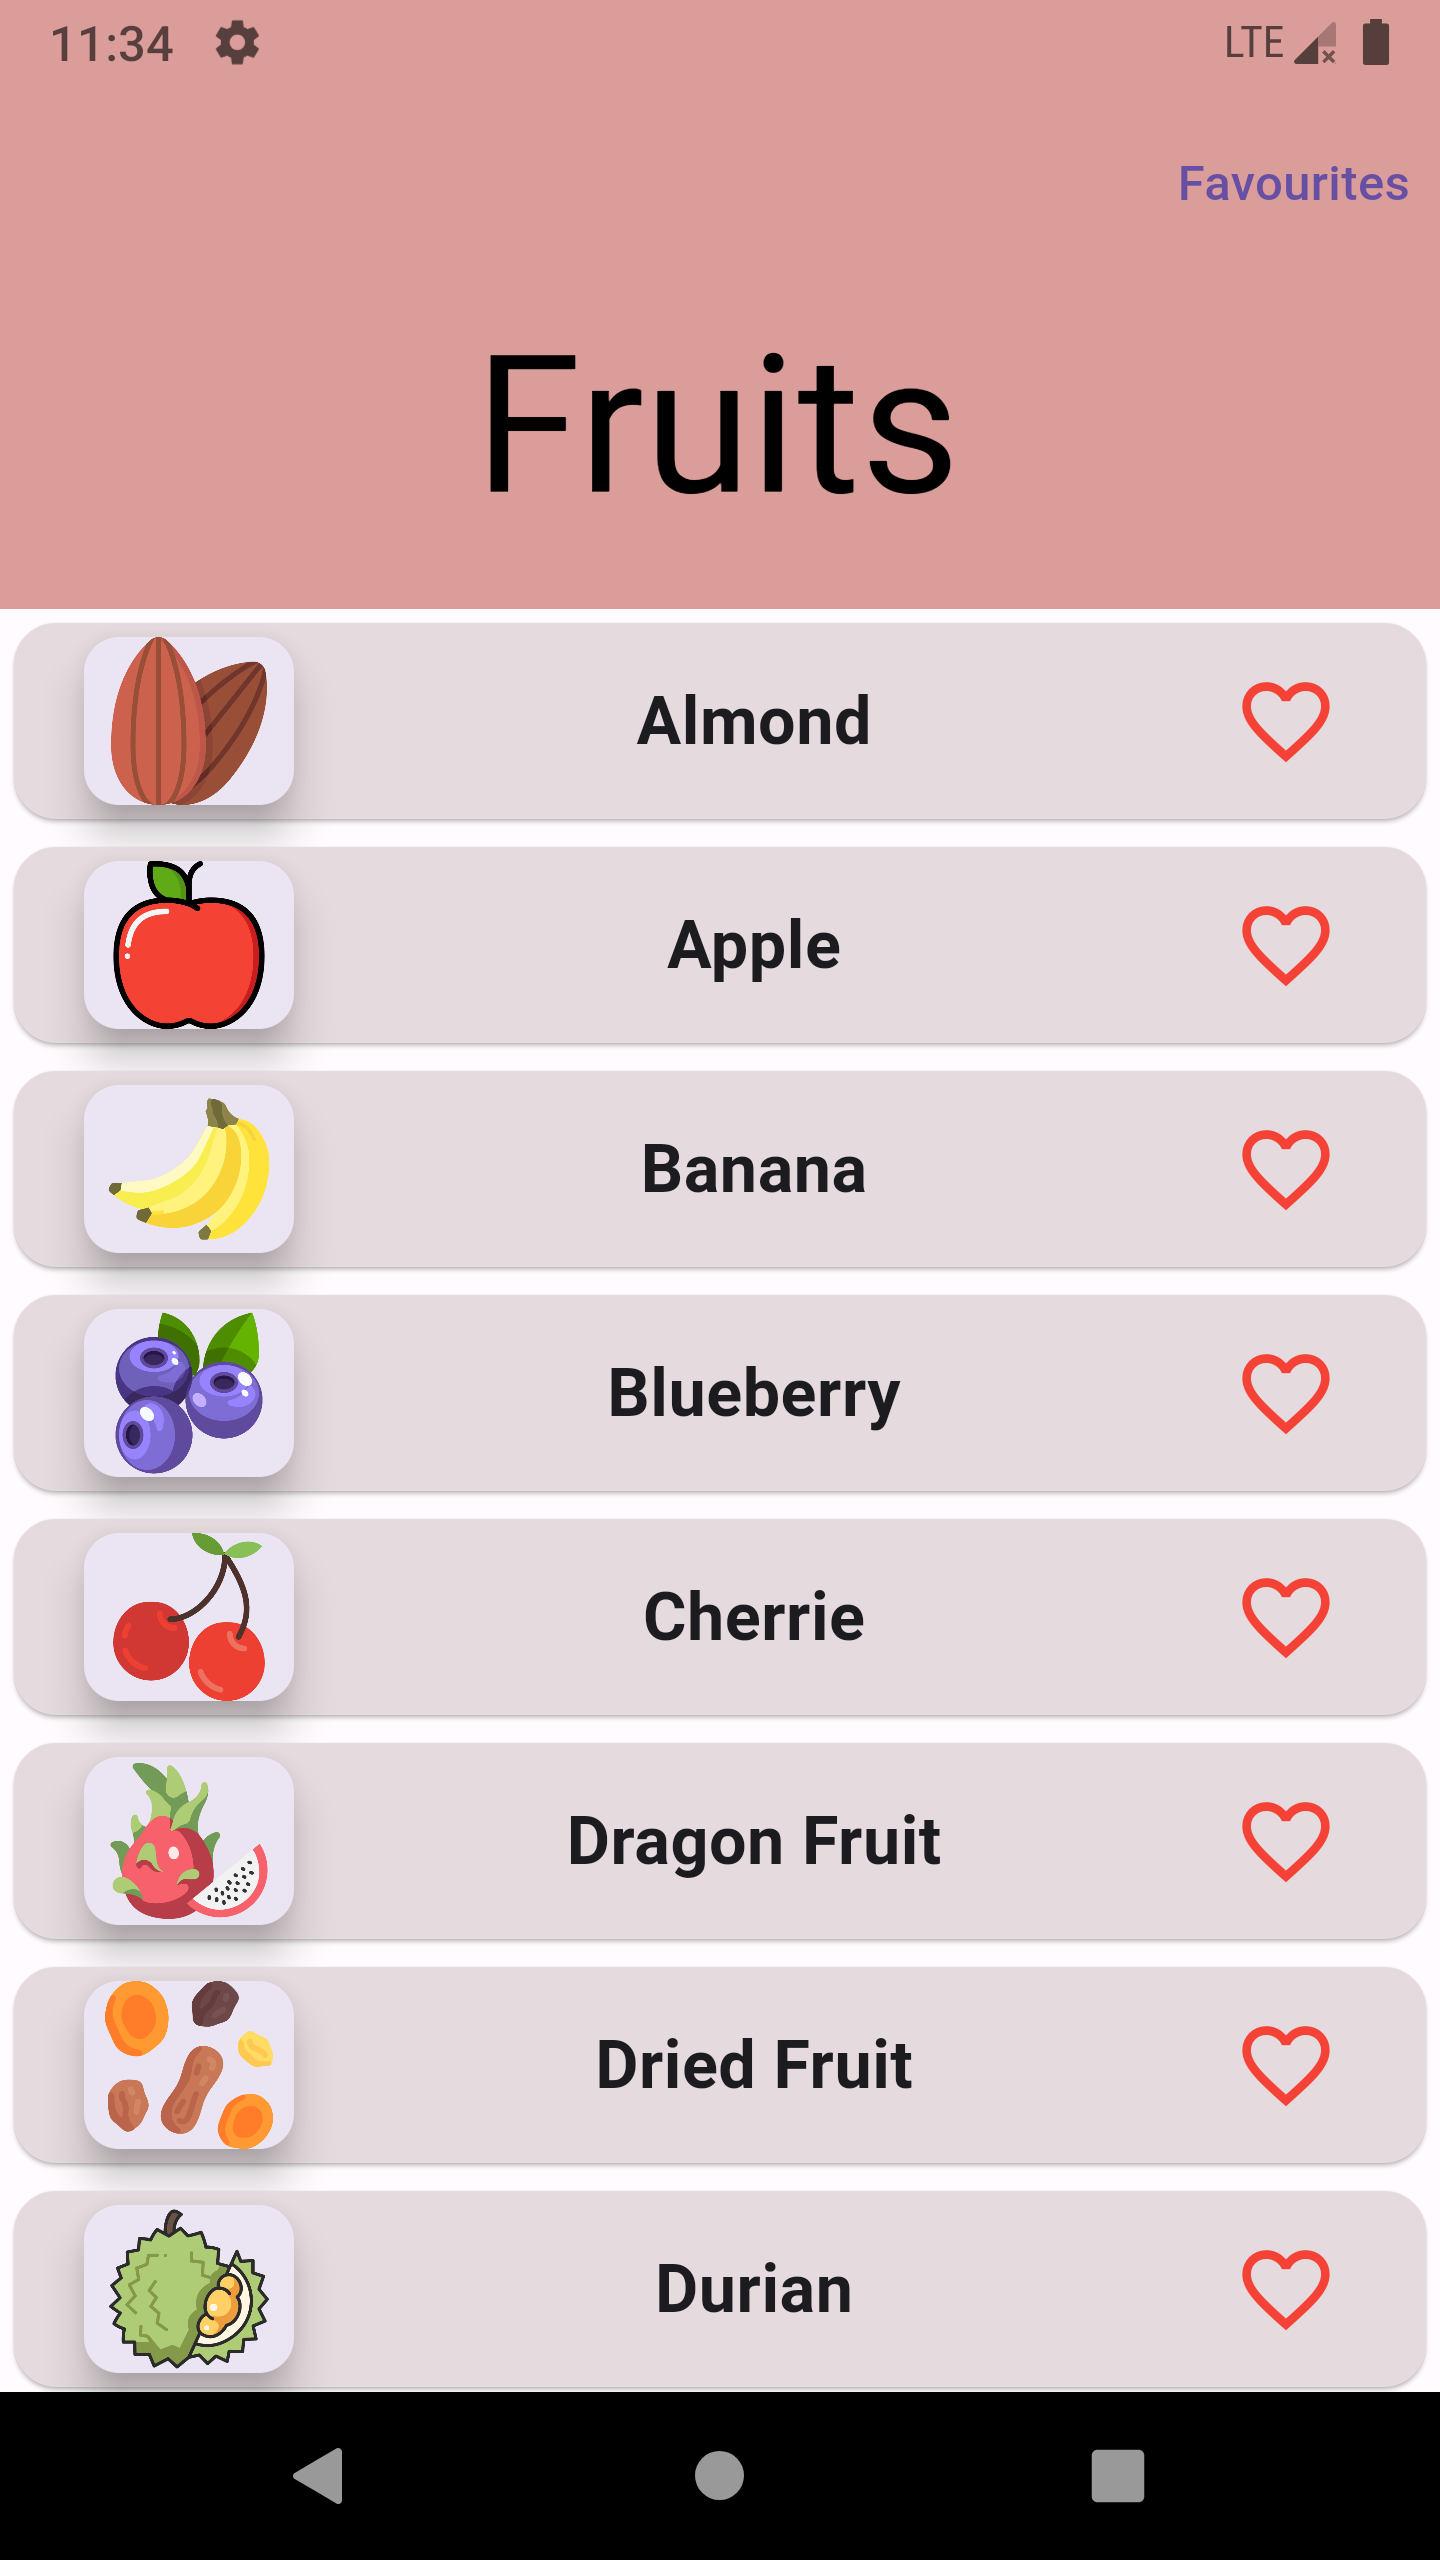
Clicking on the favourite icon adds the fruit to favourite.

Clicking again removes it from favourite.
Conclusion
The article described the use of Provider for state management. Then a simple application making use of Provider was demonstrated whereby the user can mark favourite fruits and view them in a different screen. Although Provider was applied in this little use case, you can take the information described and implement it as you desire to an application or use case of your choice. To read more on provider do check out the official documentation on pub.dev. For the full code, you can check this Github link. I hope you found this article helpful and enjoyed reading.


