

Navigating The Easy Way With Go_router
A concise article that describes go_router and its usage in a simple application.

I am a developer from Nigeria. Currently learning and working on Mobile Application development with Flutter and Python development. I am interested in learning, creating new things and writing about most of them.
The need to move from one screen to another arises when building mobile applications. Navigation is an important topic in Flutter, as most applications require navigation at one point or the other. The Flutter team provided a means of navigating between screens using the Navigator API, also known as Navigator 1.0. However, there are some shortcomings to Navigator 1.0, which warranted the development of Router API, also known as Navigator 2.0. Some libraries make it easier for developers to use the Router API. One such library is the go_router library. This article gives a general overview of navigation and demonstrates how to use the go_router library for navigating in Flutter.
The complete code for the example application can be found on GitHub.
Navigation
Navigation in mobile application development can simply be described as the process of moving from one screen (also known as a page) to another.
Navigator 1.0
Flutter provides means of navigating between screens using the Navigator API. This process is also known as the imperative process, as it involves using push() and pop() methods to navigate. This means it has to be called in every step that requires navigating. Although Navigator 1.0 can handle small-scale applications, Navigator 1.0 has the following shortcomings:
The browser's backward and forward buttons will not work properly when navigating using Navigator 1.0.
Navigator 1.0 doesn’t expose the route stack to developers.
It is difficult to handle complicated cases, like adding and removing a screen between screens.
Navigator 1.0 doesn’t update the web URL path. When you go to a new screen, you only see the base URL;
www.localhost:8000/#/.
Navigator 2.0
The Flutter team developed a better approach, which is the Router API, also known as Navigator 2.0. However, the Router API is a bit complicated to utilize. This prompted developers to create libraries that utilize Navigator 2.0 under the hood and make it easy for other developers to use. One such library is the go_router library.
Go_router
The go_router library is a simple library that makes navigating in the declarative style easy to implement. It is a developer-friendly library that performs majority of the vanilla navigation under the hood. Some of the features go_router provides are:
Display multiple screens for a destination (sub_routes).
Parsing path and query parameters, which determine how your application shows in the browsers.
go_router library provides some of the following classes:
GoRouter– this is the base class that contains each GoRoutes.GoRoute– this is the class that contains a specific route (can also be called screen or page).
Utilizing go_router in a simple application
Now that you have an overview of what the go_router library entails. You will utilize the library to create a simple application. The application will contain four screens with an elevated button in three that navigates to another screen when clicked.
To get started, do the following:
Create an application, preferably named “Navigation Demo” or a suitable name of your choice.
Clear the existing boiler code.
Add the go_router library to dependency
Add the go_router library to your application in pubspec.yaml, under dependencies.
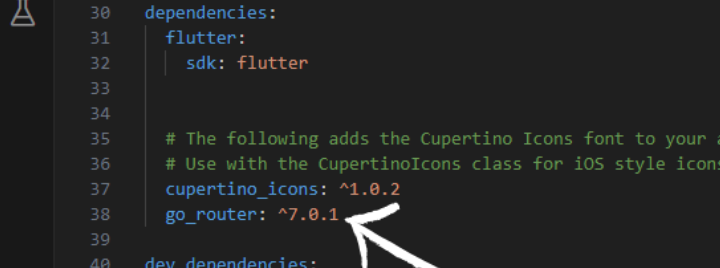
This gives access to the GoRouter class and all other classes in the library.
Save it or run flutter pub get in the terminal.
Creating the screens
Create a new folder titled “screens”. This folder will contain all four screens you will create.
Create the first screen
In the screens folder, create a new file titled first_screen.dart. In the folder, create a new StatelessWidget titled FirstScreen.

Create the second screen
In the screens folder, create a new file titled second_screen.dart. In the file, create a new StatelessWidget titled SecondScreen.

Create the third screen
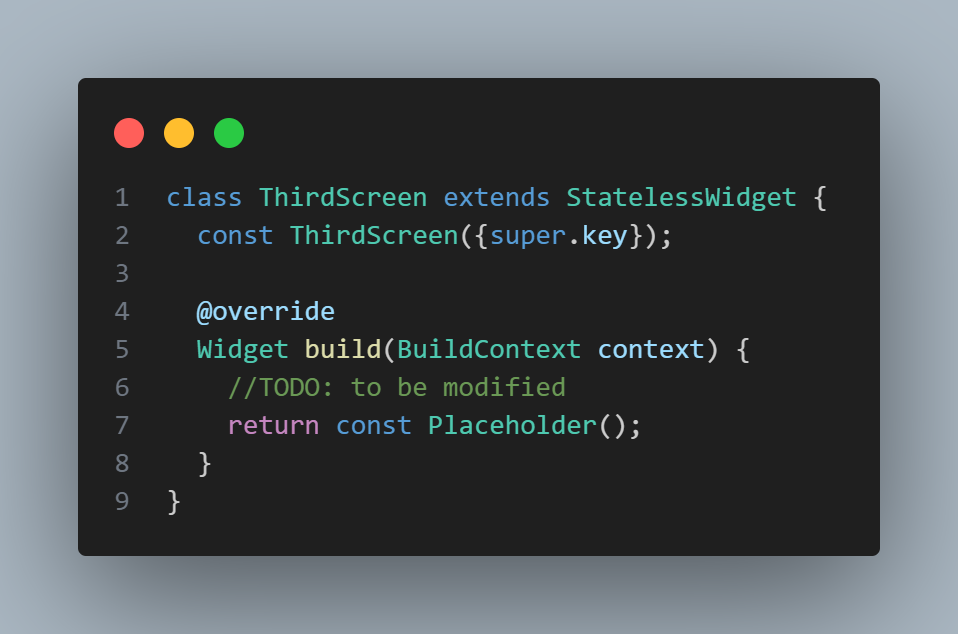
In the screens folder, create a new file titled third_screen.dart. In the file, create a new StatelessWidget titled ThirdScreen.
Create the fourth screen
In the screens folder, create a new file titled fourth_screen.dart. In the file. create a new StatelessWidget titled FourthScreen.

Creating the navigation
Create a new folder titled “navigation”. This folder will contain the GoRouter and the different GoRoutes (screens).
In the navigation folder, do the following:
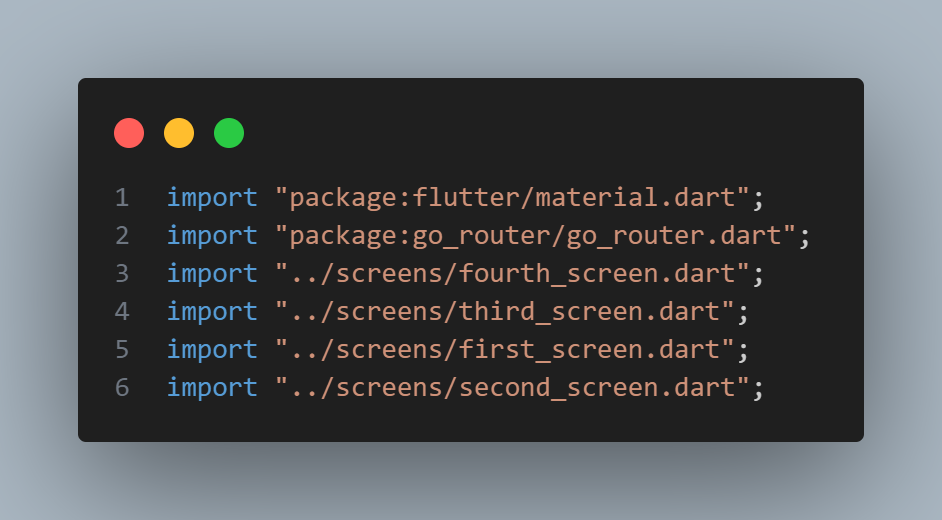
Create a new file called
app_router.dart.Add the following imports to the
app_router.dart.
Create a new class named
AppRouterAdd an instance of
GoRouterwith the differentGoRoutesbuilding different screens.
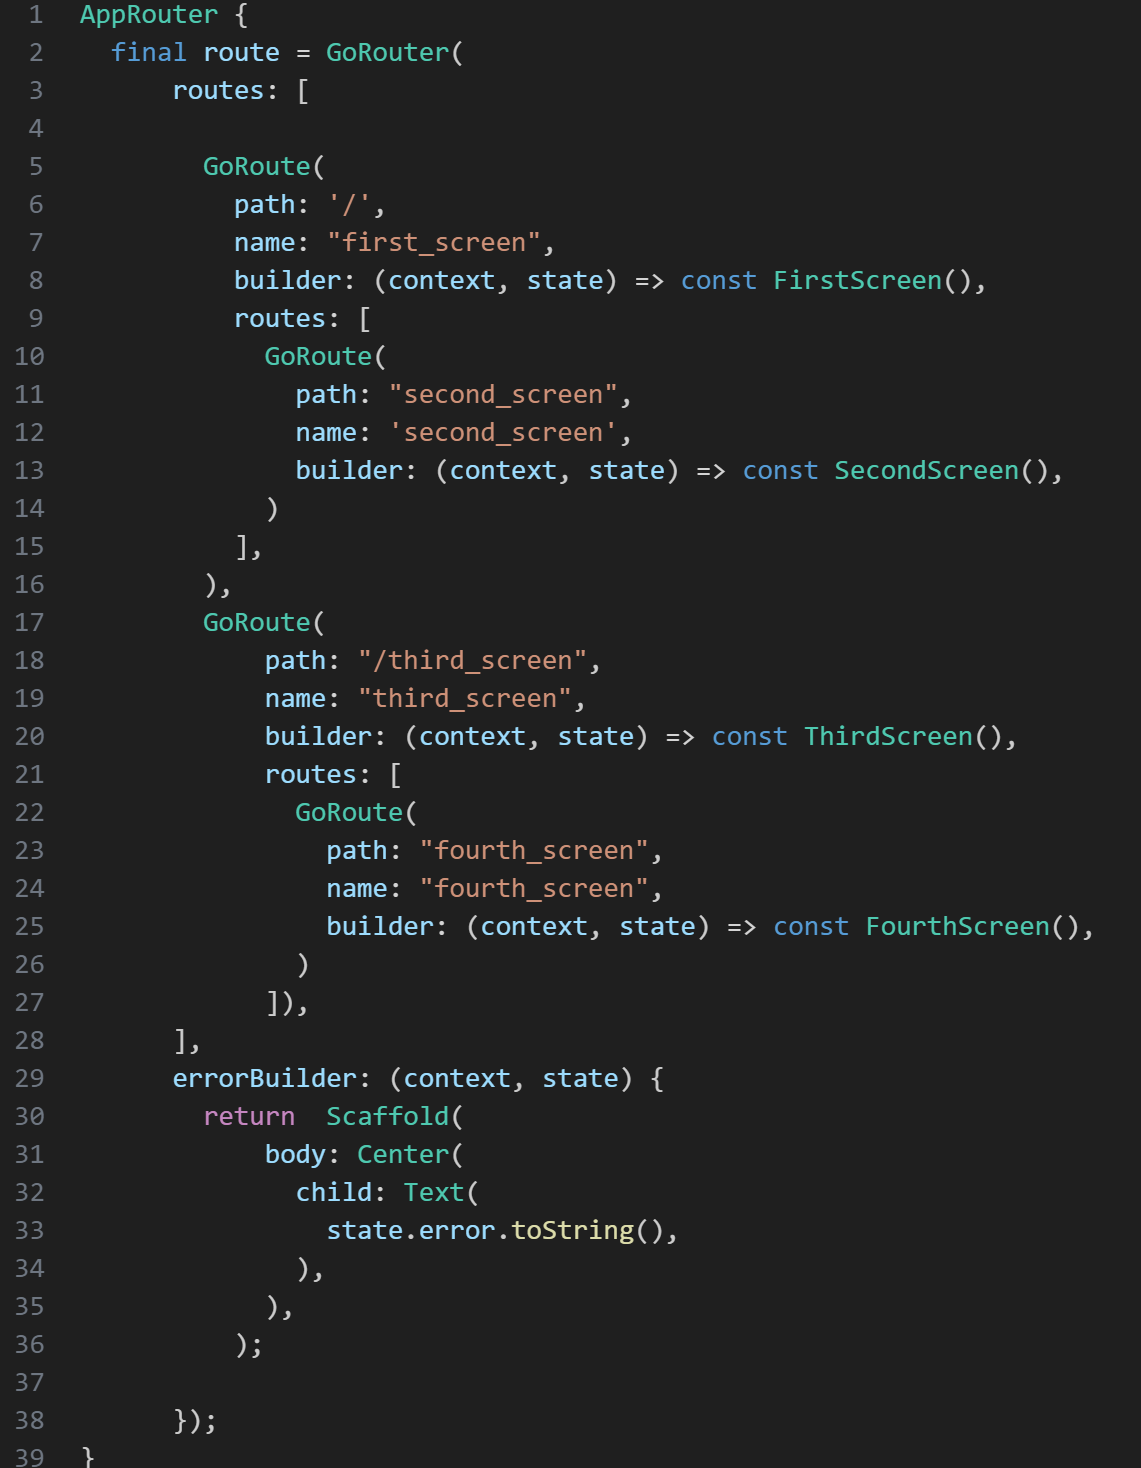
In the above, you added names to the route, so you can access them using goNamed, which is a better form as it prevents you from cramming the path. The name can be any meaningful thing you choose to use to describe the screens. Then there is the path which is the path of the GoRoute, and also what it shows in the browser. You added the SecondScreen as a descendant of FirstScreen and the FourthScreen as a descendant of the ThirdScreen. Lastly, there is the errorBuilder, which builds an error page, and comes up if you try to navigate to a route that doesn’t exist.
Note: you cannot navigate back to screens that are not descendants. Therefore, assuming you navigate to ThirdScreen, you can’t navigate back to the FirstScreen using the default android back button. Also, if the route starts or ends with “/”, a sub-route cannot start or end with "/". If there is no “/” then intialLocation argument has to be passed in the GoRouter.
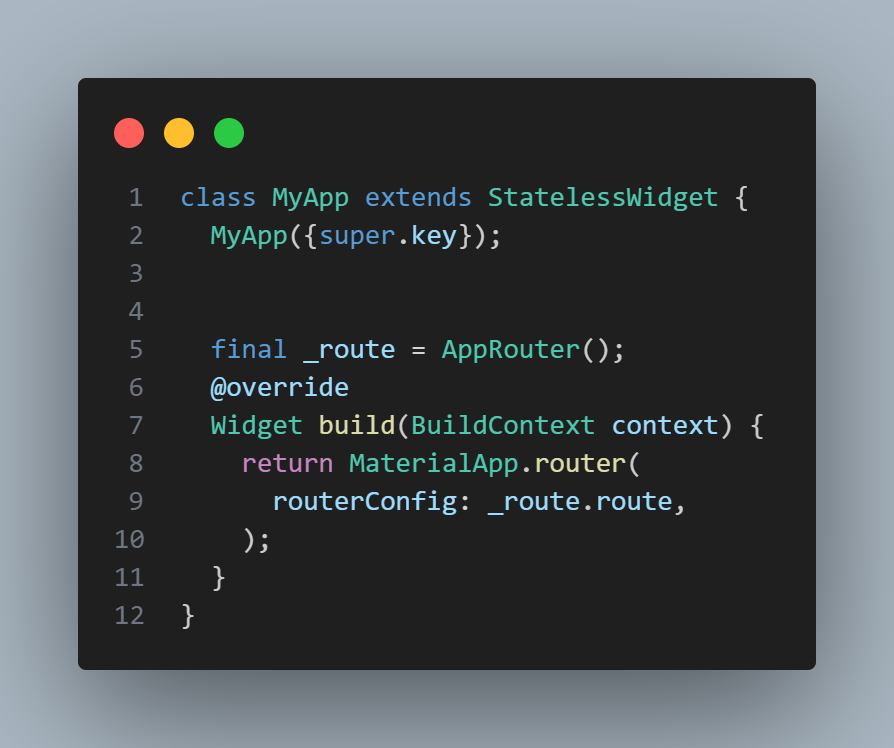
Utilize the router
Now that you have created the router, you need to pass it to your app, so the application can recognize and be able to use it accordingly. Open main.dart and add the following:
Add navigation to each screen
Remember that the created screens do not contain any code to navigate, so you will add that now.
Open
screens/first_screen.dartReturn the following to the build method of the created
FirstScreenStatelessWidget.
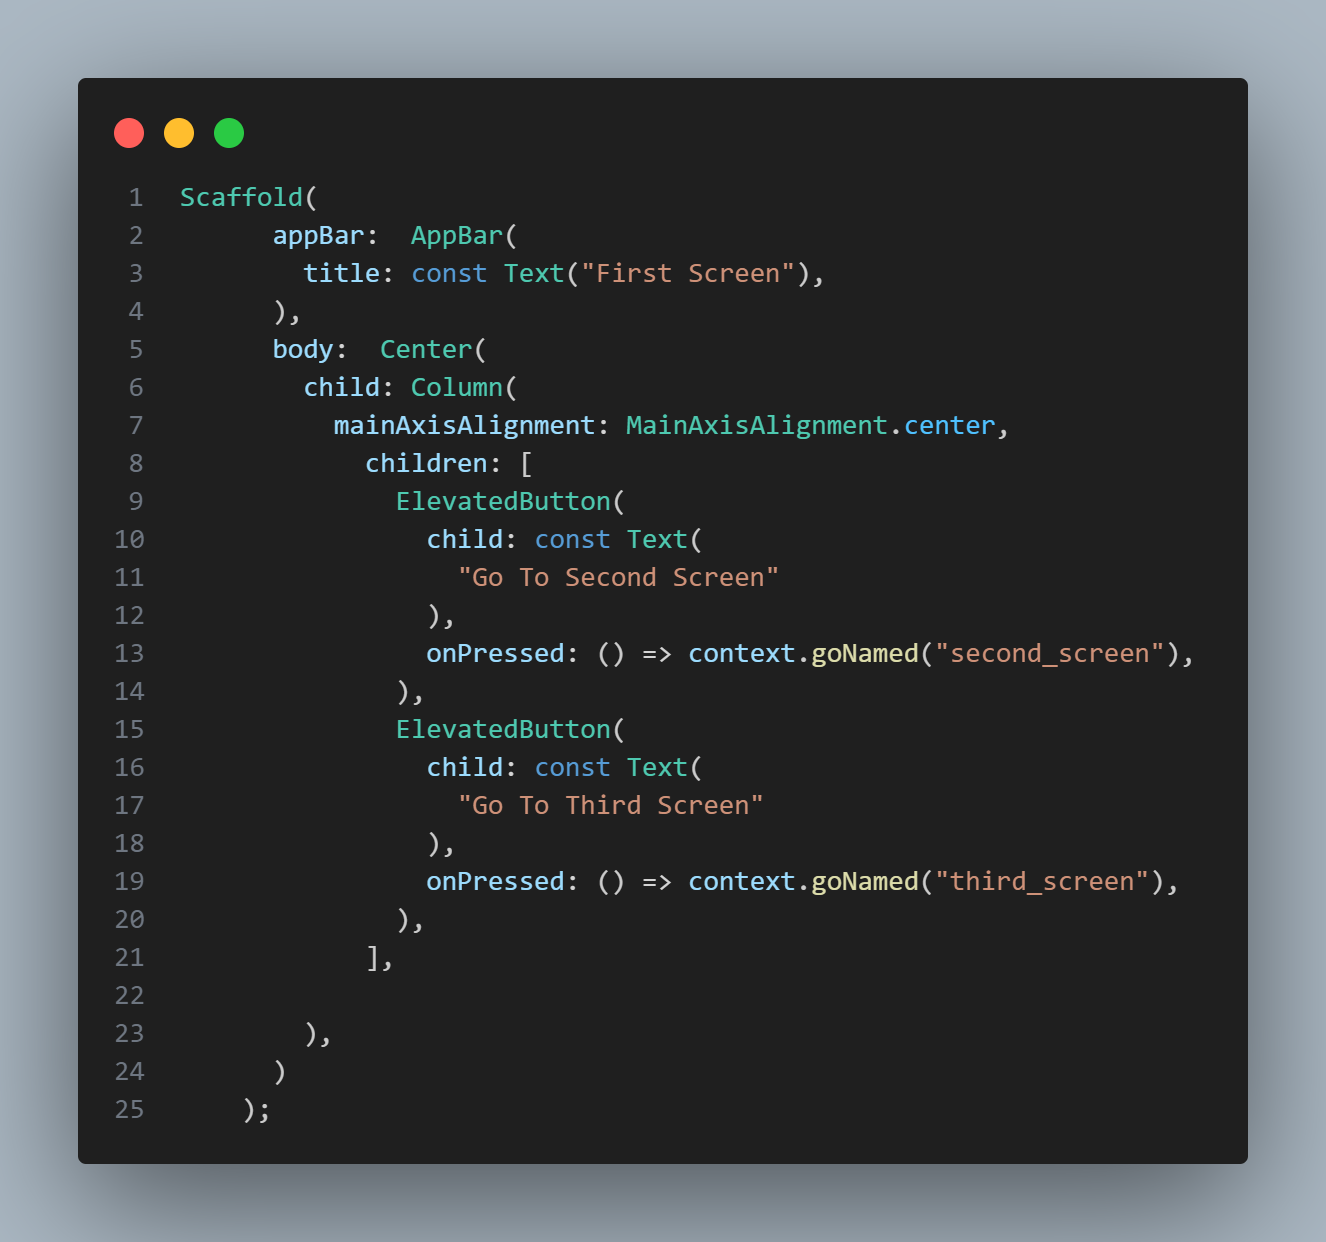
In the code above, the Scaffold widget was added, which has an AppBar with the title "First Screen". Then two ElevatedButtons are placed in a centered Column to navigate to the second and third screens.
Open
screens/second_screen.dartReturn the following to the build method of the created
SecondScreenStatelessWidget.
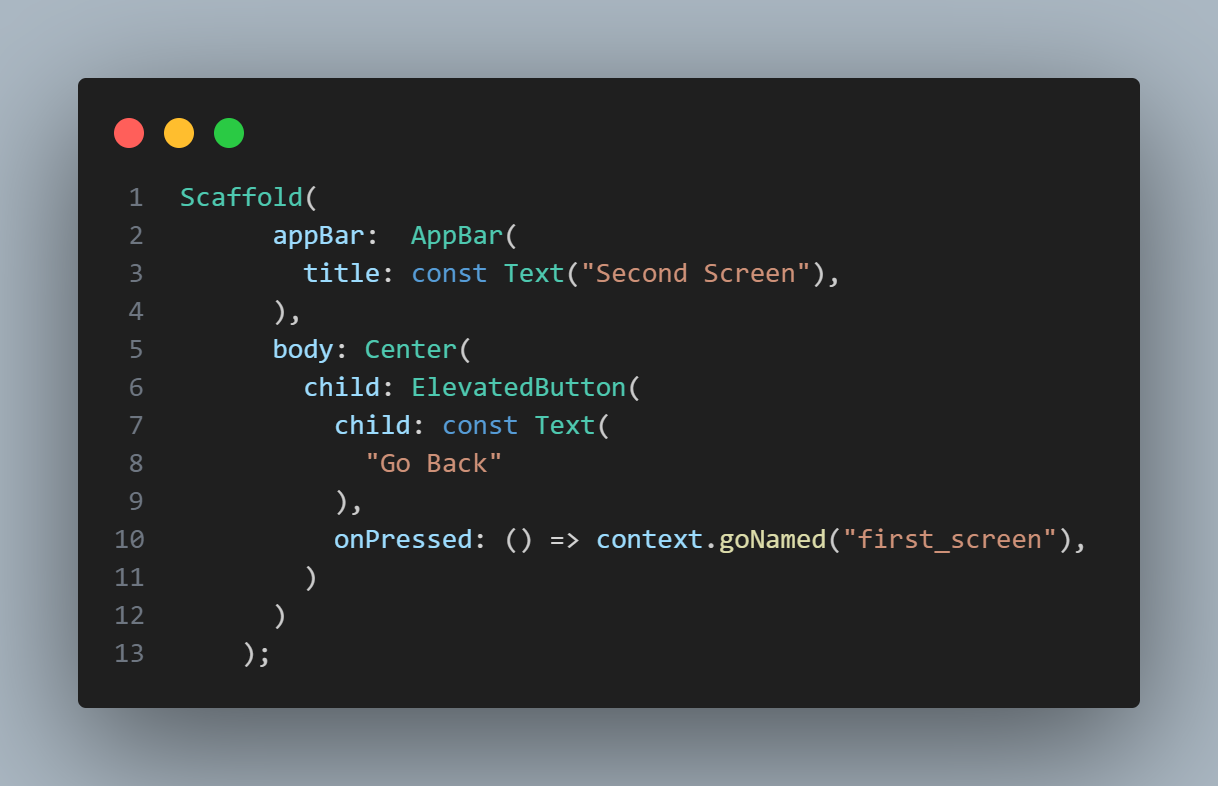
In the code above, the Scaffold widget was added, which has an AppBar with the title "Second Screen". Then an ElevatedButton is placed in a Center widget to navigate to the FirstScreen.
Open
screens/third_screen.dartReturn the following to the build method of the created
ThirdScreenStatelessWidget.
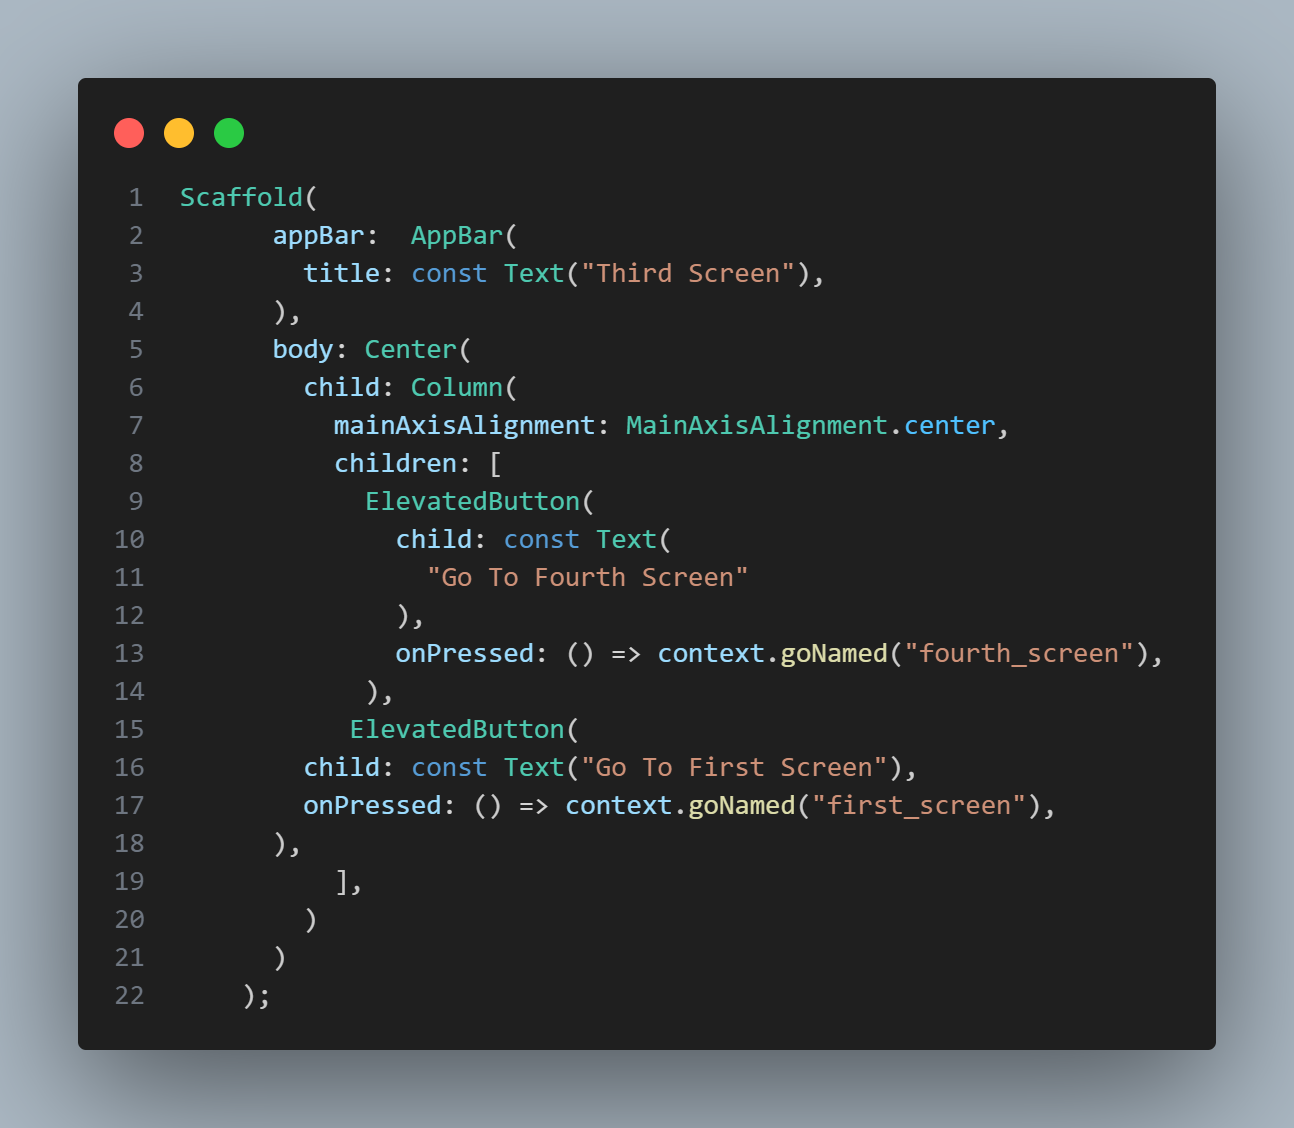
In the code above, the Scaffold widget was added, which has an AppBar with the title "Third Screen". Then two ElevatedButtons are placed in a centered Column widget to navigate to the FourthScreen and FirstScreen.
Open
screens/fourth_screen.dartReturn the following to the build method of the created
FourthScreenStatelessWidget.
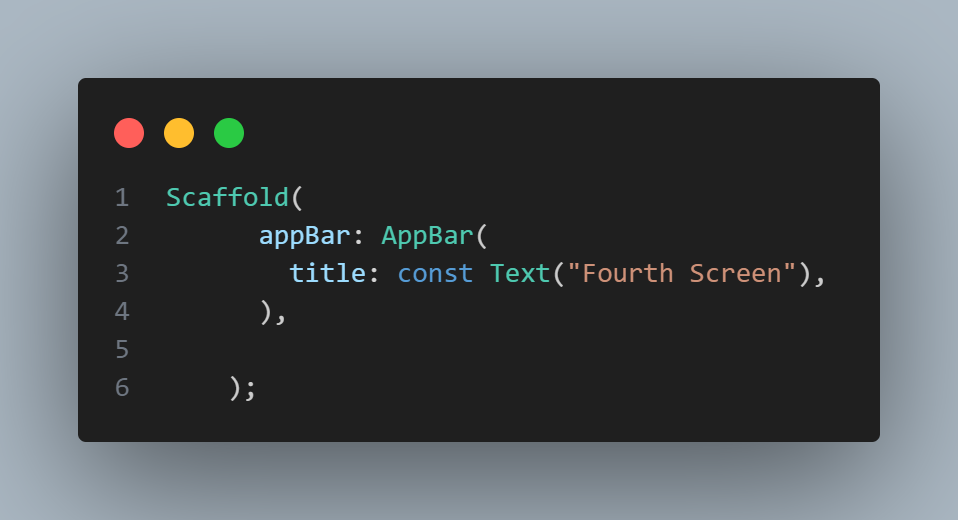
In the code above, theScaffold widget was added, which has an AppBar with the title "Fourth Screen". Here you can navigate back using the default android back button provided in the appbar.
Outcome
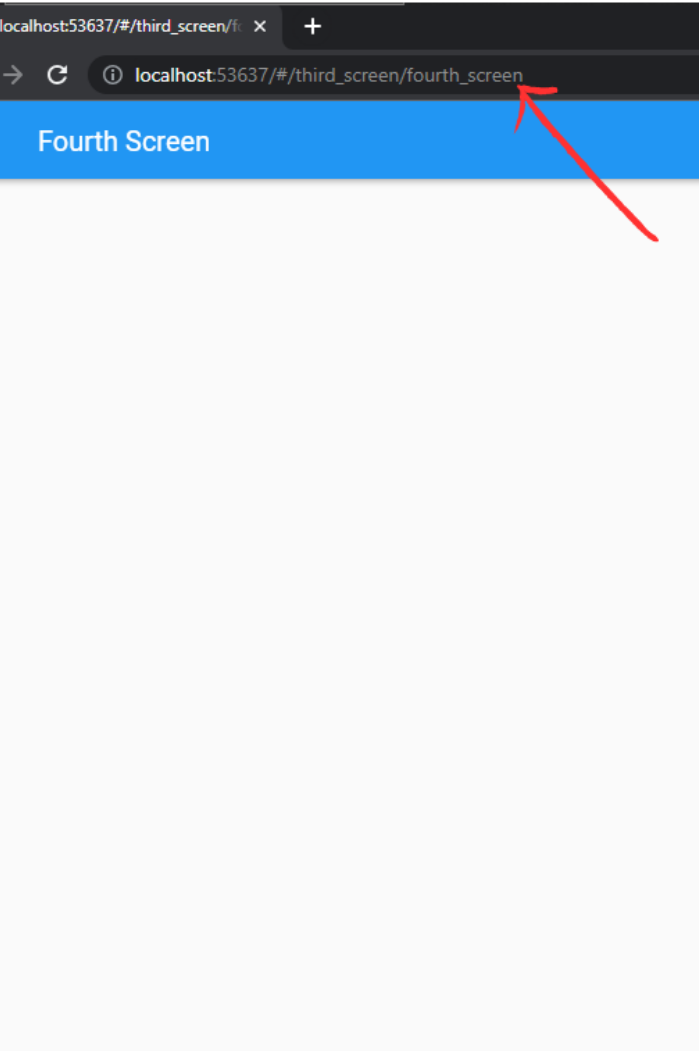
Now the screens are all set up. You will notice that when the buttons are clicked, they move to a different screen.

Also, when the application is run on Chrome, you should notice the change in path on navigation.
Conclusion
The article described the use of go_router for navigating. A simple application that utilized the go_router library was built where the users can see the working procedure of go_router. Although utilized simply, you can take the information described and implement it as you desire to an application or use case of your choice. Also, to know more about go_router read the official documentation pub.dev. I hope you found this article helpful and enjoyed reading.


